



A Windows 11 upgrade failed message can appear after an installation gets stuck, rolls back, or displays an error. Common causes include limited storage, unsupported hardware, damaged system files, and partition problems.
Windows 11 upgrade failed solutions, like checking compatibility and preparing the system drive before retrying, can resolve many upgrade issues.
Why Does Windows 11 Upgrade Fail?
Windows 11 upgrades can fail at different stages. The installation may stop at a percentage, restart several times, return to the previous Windows version, or show an error code.
Hardware compatibility is one common cause. Windows 11 requires supported hardware features such as TPM 2.0, Secure Boot capability, and a compatible 64-bit processor. Storage and system configuration can also affect the installation.
Before troubleshooting, note the exact error message or percentage where the upgrade stops. This information can help identify whether the problem is related to hardware, Windows Update, storage, or the disk layout.
Common Reasons Windows 11 Upgrade Fails
Several problems can result in a Windows 11 upgrade failed. The most common ones are related to storage, hardware, system health, and partitions.
Insufficient storage space
Windows needs free space to download, unpack, install, and temporarily store upgrade files. A nearly full C drive can cause the installation to fail or roll back. Open “Settings,” select “System,” and choose “Storage” to check available space. Remove unnecessary applications and files if the system drive is nearly full.
Unsupported hardware
Windows 11 has specific hardware requirements. TPM 2.0, Secure Boot capability, sufficient RAM, and a supported processor are important checks. You can use Microsoft’s PC Health Check application to review compatibility. If TPM or Secure Boot is supported but disabled, you may need to enable them through UEFI firmware settings.
Partition problems
The disk layout can also contribute to upgrade failures. A very small system partition, unusual partition configuration, or insufficient space around required partitions can interfere with installation. Partition style may matter as well. Modern Windows systems normally use GPT with UEFI rather than MBR with legacy BIOS.
Fix 1: Free Up Storage Space
Removing unnecessary data is one of the simplest ways to prepare for another upgrade attempt. Focus on the system drive because temporary installation files are commonly stored there.
1. Open “Settings,” go to “System,” and select “Storage.” Review “Temporary files” and select items you no longer need, then click “Remove Files”. You can also enable “Storage Sense” to automatically remove certain temporary files.
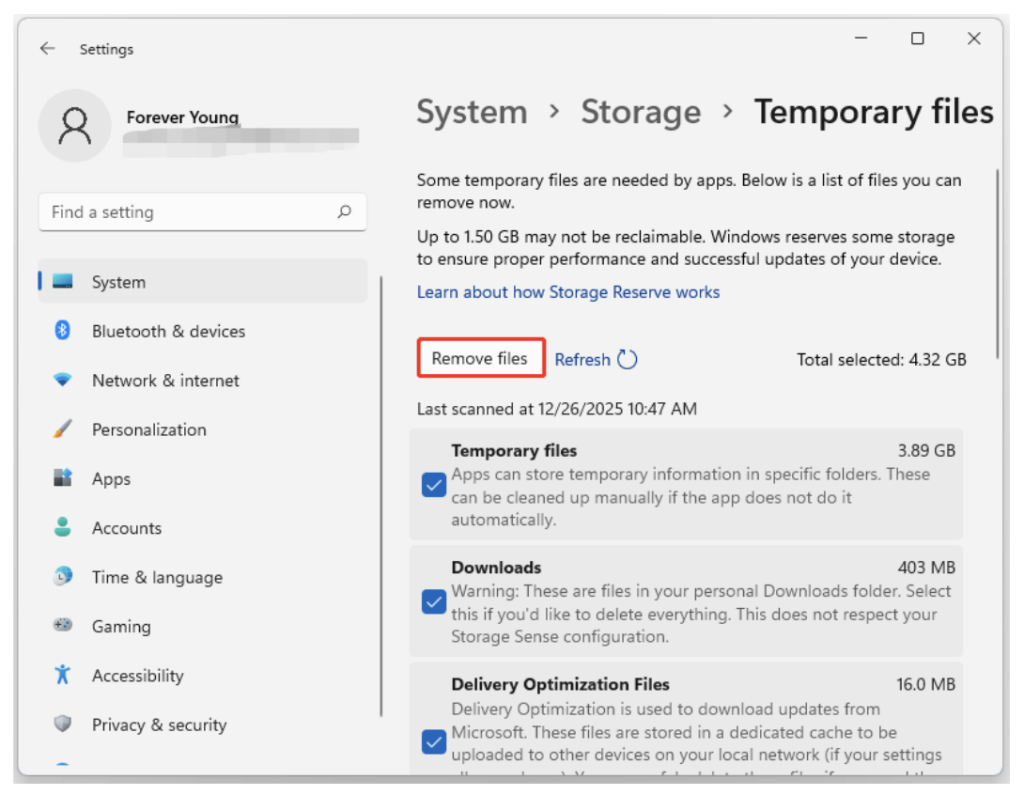
2. Large videos, installers, archives, and other personal files can consume significant space. Move them to another internal drive or external storage instead of deleting files you still need.
3. After cleanup, restart the computer and check the available storage again. Having additional free space gives Windows more room to complete the installation.
Fix 2: Check Windows Update and System Health
Windows Update components can sometimes become stuck or fail to process upgrade files correctly. Restarting the update process and checking system files can help before attempting another upgrade.
1. Open “Settings,” select “Windows Update,” and install any available updates. Restart the computer afterward and check for updates again.
2. If Windows Update continues to fail, open “Settings,” select “System,” then “Troubleshoot” and “Other troubleshooters.” Run the available Windows Update troubleshooter and follow its recommendations.
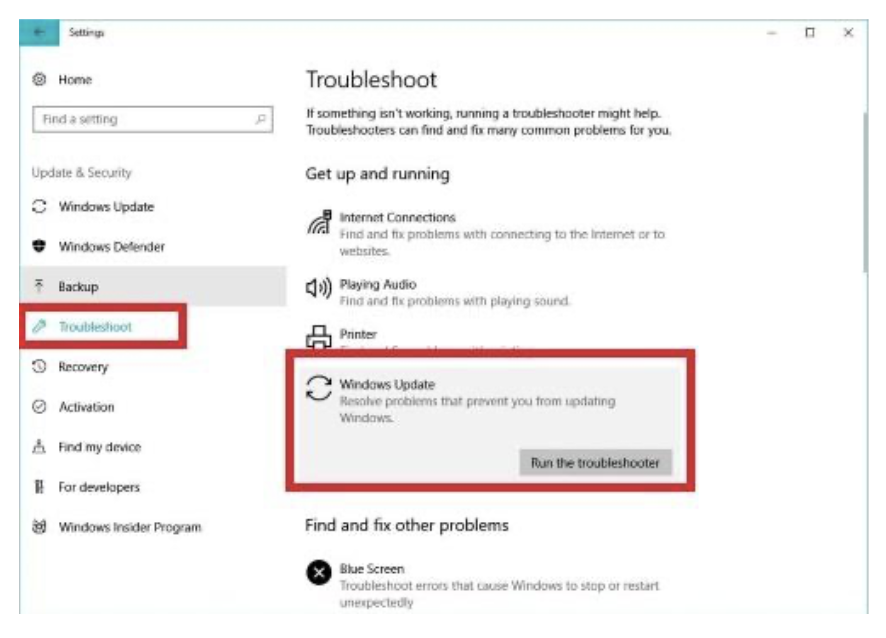
3. You can also check Windows system files using Command Prompt. Run “sfc /scannow” and allow the scan to finish. If Windows reports component-store problems, use the DISM repair command “DISM /Online /Cleanup-Image /RestoreHealth” before running SFC again.
Restart the PC after repairs and retry the upgrade. If the same error returns, move to disk and partition checks rather than repeatedly starting the installation.
Fix 3: Prepare Disk Partitions Before Upgrade
Partition-related issues require more attention when the C drive has very little space or the disk layout does not provide enough usable capacity. Simply deleting personal files may not solve this situation.
- Check your partitions through Disk Management by searching for “Create and format hard disk partitions.” Review the C drive, system partitions, and available unallocated space.
- If unallocated space is directly beside the C drive, right-click the C partition and select “Extend Volume.” Follow the wizard to add the available space.
- If the unallocated space is separated from C by another partition, Windows Disk Management may not be able to extend C directly. Moving, resizing, or reorganizing partitions can be necessary.
A graphical partition utility such as 4DDiG Partition Manager can simplify these tasks. It allows you to resize, extend, move, and manage partitions through a visual interface. This can be useful when you need to fix Windows upgrade problems caused by a restrictive disk layout.
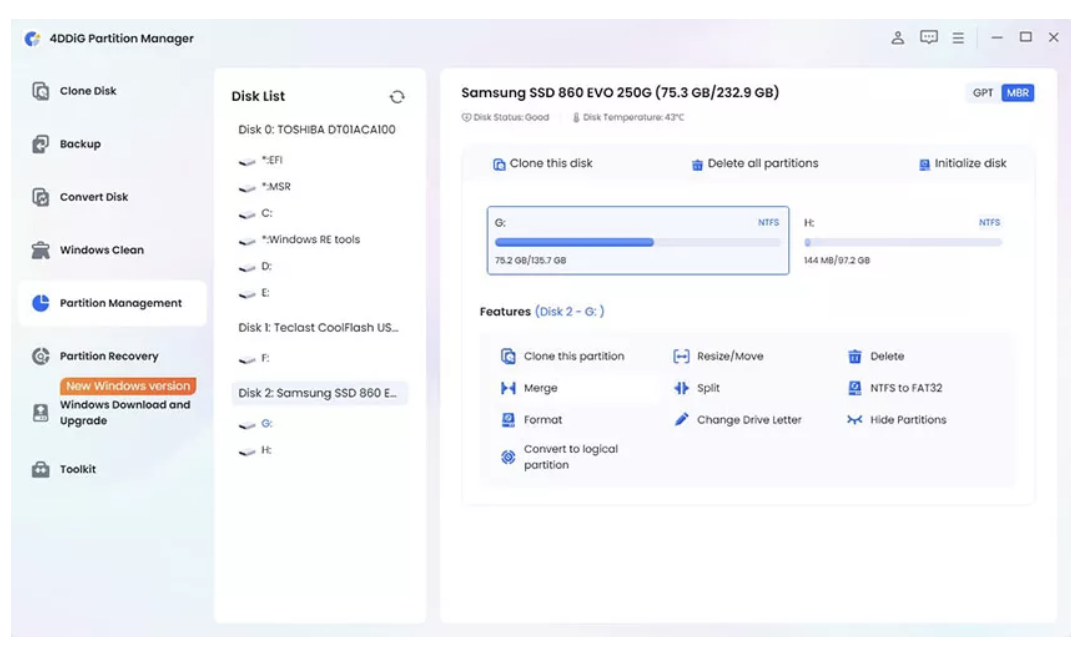
Before applying partition changes, verify that the correct disk and partition are selected. Back up important files first, especially when modifying the system disk.
Prevention Tips Before Future Updates
Preparing Windows before a major update can reduce the chance of another failed installation. Pay attention to these areas:
- Keep sufficient free space on the Windows system drive.
- Install pending Windows updates before starting a major upgrade.
- Keep important device drivers reasonably up to date.
- Check TPM, Secure Boot, and processor compatibility.
- Back up important files before changing partitions.
- Avoid interrupting the computer during installation.
- Remove unnecessary applications that may interfere with setup.
These checks are particularly useful when upgrading older hardware or systems with years of accumulated files and applications.
Conclusion
A Windows 11 upgrade failed message usually has an identifiable cause. Check hardware compatibility, ensure there is enough free storage, repair Windows system components, and inspect the disk layout before trying again. If partition limitations are involved, properly resizing or reorganizing the system drive can provide the space Windows needs to complete the upgrade.