
If an older computer has become slow, replacing its hard drive with an SSD can significantly improve everyday performance. Faster boot times, quicker application launches, and more responsive file access are common reasons users make the switch.
Learning how to clone a hard drive to SSD can make the upgrade easier because cloning copies your existing Windows installation, applications, personal files, and settings to the new drive. You can then continue using your familiar system without starting from scratch.
What Should You Prepare Before Cloning?
A successful cloning process starts with choosing compatible hardware and protecting your data. Prepare the SSD, check the existing drive, and create a backup before moving anything.
Choose The Right SSD
First, choose an SSD with enough capacity for the data currently stored on your hard drive. The SSD does not always need to match the HDD’s total capacity, but it must have enough usable space for the partitions and data being cloned.
Check the interface supported by your computer before purchasing. Common options include SATA and NVMe, but the physical slot, connector, and motherboard support also matter. For laptops, check the manufacturer’s specifications to confirm which SSD type fits.
Back Up Important Data
Cloning normally copies data from one drive to another without changing the source drive. However, unexpected interruptions, hardware problems, or selecting the wrong destination can still create risks.
Back up important documents, photos, videos, and other irreplaceable files before starting. Ideally, keep the backup on a separate external drive or reliable cloud storage.
Connect The New SSD
For a desktop computer, you can install the SSD internally and connect it directly to the motherboard. If you are working with a laptop or do not want to open the computer immediately, a compatible USB-to-SATA adapter or external enclosure can connect a SATA SSD temporarily. Make sure Windows detects the new SSD before beginning the cloning process.
Method 1: Clone Hard Drive Using Disk Cloning Software
Disk cloning creates a copy of the source drive on another drive. Unlike manually copying folders, cloning can transfer the operating system, boot information, applications, partitions, and personal data needed to reproduce the existing Windows environment.
An SSD cloning software solution can simplify this process, especially for beginners who want to migrate their current installation instead of reinstalling Windows and every application.
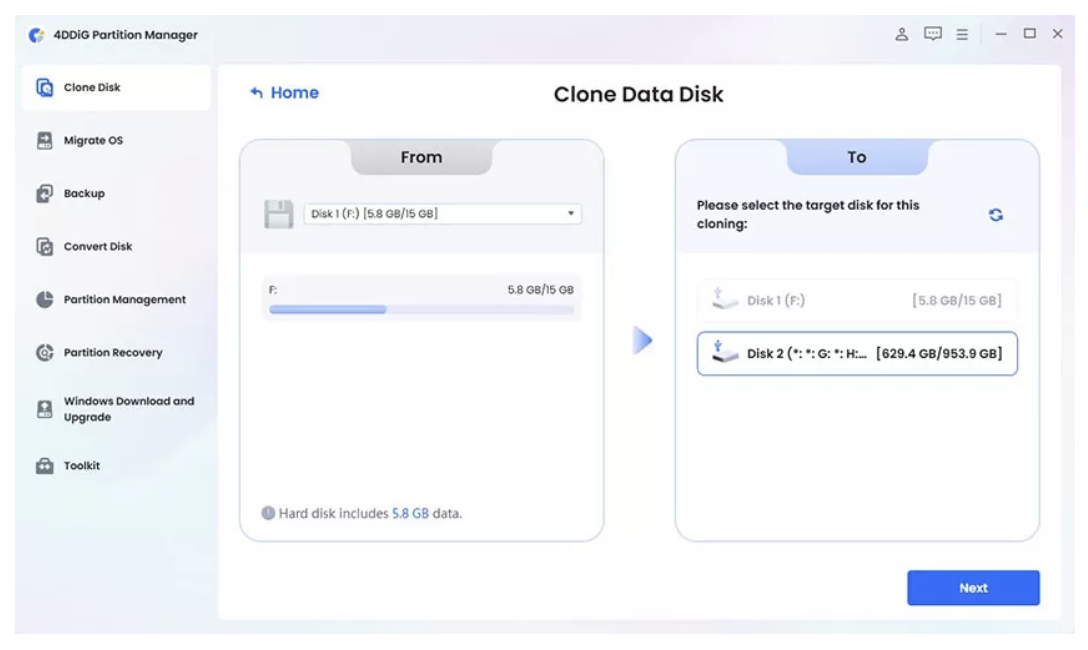
4DDiG Partition Manager includes disk cloning and system migration features that can help transfer an existing installation to an SSD.
- Connect the new SSD to your computer and open 4DDiG Partition Manager. Check the listed drives carefully and identify your current HDD as the source and the new SSD as the destination.
- Select the disk cloning or system migration option, then choose the source HDD and destination SSD. Review the displayed disk information before confirming because the destination drive will be overwritten during cloning.
- Start the cloning process and allow the software to copy the required data. The duration depends on the amount of data being transferred and the speed of both drives. Do not disconnect either drive or shut down the computer while cloning is in progress.
- When the process finishes, check that the SSD contains the expected partitions and data before replacing the original HDD.
Method 2: Replace HDD With The Cloned SSD
After you are done with the steps on how to clone a hard drive to SSD, the next step is to make the computer start Windows from the new SSD. If you connected the SSD externally, shut down the computer before physically replacing the old drive.
For a desktop, disconnect power and install the cloned SSD using the appropriate connection. For a laptop, follow the manufacturer’s instructions for removing the existing drive and installing the SSD.
Turn on the computer and check whether Windows starts normally. If the system continues booting from the old HDD, enter the computer’s BIOS or UEFI settings during startup. The required key varies by manufacturer and may be “F2”, “F12”, “Delete”, or another key.
Find the “Boot” or “Boot Order” section and place the cloned SSD above the old drive. Save the changes and restart the computer.
Once Windows loads from the SSD, check your applications, files, and settings. Keep the original HDD untouched until you have confirmed that everything important works correctly.
Common Problems After Cloning
Cloning is usually straightforward, but several problems can appear after migration.
SSD Not Detected
If the SSD does not appear in Windows or BIOS, check its physical connection first. For an external SSD, try another USB port or cable. For an internal drive, verify that the connector is securely attached and that the motherboard supports the drive type.
Windows Does Not Boot
A boot error can occur if the system is still using the wrong boot device or if boot information was not transferred correctly. Check the BIOS or UEFI boot order and make sure the cloned SSD is selected as the primary boot device.
Incorrect Partition Size
If the destination SSD is larger than the original HDD, the cloned system may not automatically use all available space. Open “Disk Management” and check whether unallocated space remains. You may be able to extend the appropriate partition to use that capacity.
If the SSD is smaller than the HDD, make sure the amount of data being cloned fits within the SSD before starting. Some cloning tools allow you to adjust partition sizes during migration.
Conclusion
Learning how to clone a hard drive to SSD provides a practical way to upgrade storage without rebuilding your Windows environment. Prepare a compatible SSD, back up important data, connect the new drive, and use reliable cloning software to migrate the system.
After cloning, configure the SSD as the boot drive and verify that everything works before removing or formatting the original HDD. This approach can deliver a faster system while preserving your existing files, applications, and settings.