
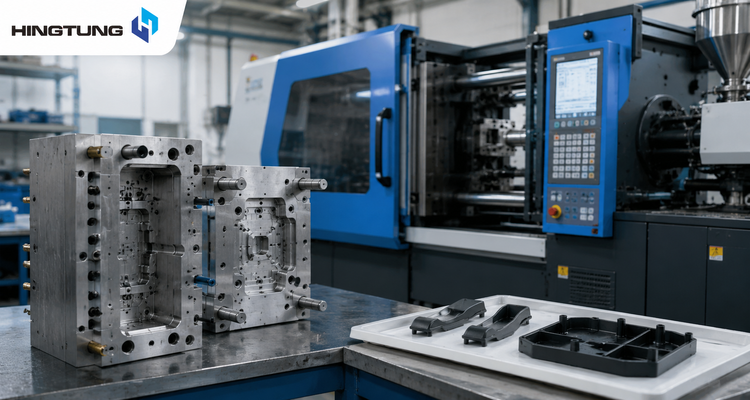
Prototype Injection Molding: When Should You Move Beyond 3D Printing?
A working 3D-printed prototype does not always mean a product is ready for production. Fit may look right, but molded resin can shrink, flow, flex, and fail differently. Prototype injection molding helps close that gap by producing small batches with the molding process and, often, the same thermoplastic planned for production.
For OEM teams moving toward tooling, HingTung prototype injection molding can combine DFM, mold development, molding, and sample inspection so that early molded parts provide useful production feedback rather than simply another prototype.
What Is Prototype Injection Molding?
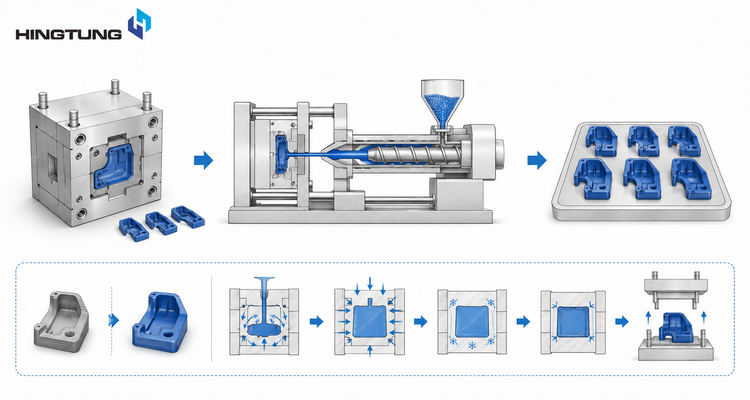
Injection molding prototyping uses an injection mold to manufacture limited quantities of parts before committing to full production tooling. The objective is usually to verify form, fit, function, material behavior, manufacturing feasibility, or market demand under conditions closer to real production.
Unlike a printed prototype, an injection-molded prototype experiences cavity filling, packing, cooling, shrinkage, ejection, and flow orientation. That makes prototype plastic injection molding especially useful when the feature being tested depends on actual molded behavior.
Prototype tools are commonly simpler than long-life production tools. Aluminum and other relatively easy-to-machine tooling materials are commonly used when rapid development and lower initial investment matter. Some rapid-tooling services advertise mold lead times of roughly 7 to 14 days, although actual timing depends on geometry, tool complexity, supplier capacity, and validation requirements.
When Do You Need an Injection-Molded Prototype?
Prototype tooling becomes useful when 3D printing or machining can no longer answer the questions that matter before production.
Consider a product developer who has a working 3D-printed design and is preparing an initial run of around 5,000 parts. The discussion quickly moved away from whether the CAD model worked and toward moldability, wall thickness, draft, tolerance, resin, tooling investment, and realistic unit cost.
That is the point where a prototype mold can add meaningful information.
Typical reasons include:
- checking snap fits using molded material
- confirming assembly and mating features
- evaluating shrinkage and warpage
- reviewing cosmetic surfaces
- testing functional performance
- producing samples for market or customer testing
- reducing risk before higher-investment production tooling
A prototype is therefore most valuable when it answers a specific manufacturing or product question.
3D Printed Prototypes vs Injection-Molded Prototypes
3D printing and molded prototypes are often compared because they answer different questions during product development.
3D printing remains valuable because designs can be revised quickly without machining a mold. However, it does not always reproduce the physical behavior created during injection molding.
| Factor | 3D Printed Prototype | Injection-Molded Prototype |
| Tooling required | No conventional mold | Prototype mold required |
| Design iteration | Very fast | Changes may require tooling modification |
| Production resin | Depends on printing technology | Actual molding-grade resin can be used |
| Flow orientation | Not representative of molding | Produced during actual cavity filling |
| Shrinkage behavior | Different process | Representative of molding process |
| Surface | Printing-process dependent | Molded surface |
| Repeat batches | Useful at low quantities | Better suited as quantity increases |
| Production learning | Limited for molding variables | Reveals mold and process behavior |
This difference becomes especially important with flexible or fatigue-sensitive features.
Snap-fit testing is a good example. A Nylon 12 printed prototype may provide useful early feedback, but a molded Nylon part can behave differently because the molding process creates different flow orientation and material structure. For validating the final snap feature itself, a molded sample was therefore more representative.
That does not mean every prototype needs a mold. If geometry is still changing frequently, 3D printing or CNC machining can remain the better development method.
Design the Part for Injection Molding Before Building the Tool
A successful printed part is not automatically ready for injection molding.
Before prototype molding, DFM should review features such as wall thickness, draft, ribs, bosses, undercuts, corner transitions, gate location, and ejection.
A part can function perfectly as a print and still create molding problems such as excessive wall thickness, insufficient draft, or sink around thick boss features. These issues were not problems with the working 3D prototype itself. They were problems created by changing the manufacturing process.
For prototype tooling, design review has another benefit: modifications are normally less expensive before machining begins.
At HingTung, molded-part CAD can be reviewed during DFM before prototype tooling is finalized. The purpose is to identify which geometry needs modification for molding while preserving the functions already proven in the prototype.
Material Selection Is One of the Main Reasons to Mold a Prototype
Material selection is one of the strongest reasons to move from a printed prototype to an injection-molded sample.
A prototype made from the final or equivalent production thermoplastic can reveal behavior that another manufacturing process cannot reproduce completely.
Typical molding materials may include ABS, PC, PP, nylon, and other engineering thermoplastics depending on the product requirements.
This becomes particularly important when testing:
- snap-fit life
- stiffness
- heat resistance
- dimensional stability
- impact performance
- assembly force
- surface appearance
A component used inside a hot vehicle, for example, cannot be specified simply as “ABS or another plastic.” Service temperature, mechanical load, geometry, and cost all affect the final resin choice.
For prototype plastic molding, the material should therefore represent what the production part actually needs to do, not just what is convenient to process.
Prototype Injection Molds: Aluminum, Steel, or Another Approach?
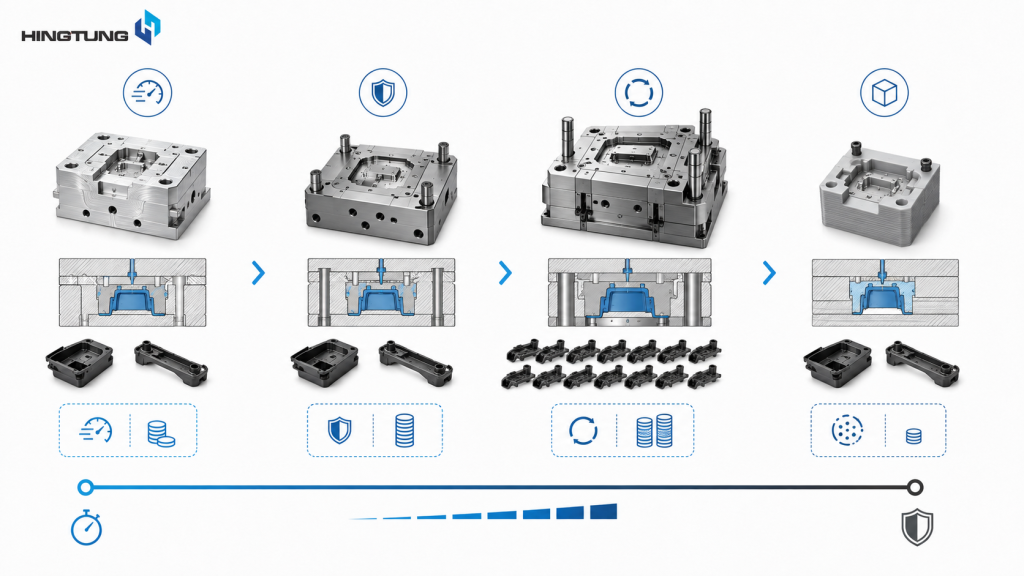
Prototype tooling usually involves a trade-off between faster, lower-investment molds and more durable tools that can continue into production.
Aluminum is commonly associated with prototype and rapid tooling because it can be machined relatively quickly. Steel provides greater durability and may make more sense when the prototype tool will continue into repeated production.
| Tooling Approach | Main Advantage | Main Consideration |
| Aluminum mold | Faster machining and lower initial commitment | Lower wear resistance than hardened steel |
| Soft or pre-hardened steel | Greater durability | More tooling investment |
| Production steel | Long tool life and repeat production | May be excessive for early validation |
| 3D printed mold | Useful for highly limited experimental cases | Life, accuracy, material and process limitations |
3D-printed molds can be useful for experimental quantities, but their life can be unpredictable. In one reported user case, printed molds lasted around 10 shots or fewer, although other users reported substantially longer life. This should be treated as an individual experience rather than a tooling specification.
If the product is already likely to move into repeat production, going directly to aluminum or steel may avoid building an intermediate tool with little later value.
How Much Does Prototype Injection Molding Cost?
There is no reliable universal prototype injection molding cost.
Cost depends on part size, mold construction, cavities, material, side actions, tolerances, surface finish, tooling material, expected mold life, and the number of molded parts.
A real-world user example estimated roughly $8,000–$10,000 for a relatively large single-cavity soft-steel mold in China and around $0.70–$1.00 per molded part. These figures are project-specific and should not be treated as standard market pricing. Another participant described mold tooling more generally as costing thousands to tens of thousands of dollars. These are individual project estimates and should not be treated as standard pricing.
Their value is in showing how unrealistic early assumptions can be. In that discussion, the product developer initially hoped for a part price below $0.30 without having calculated material weight, cycle time, tool size, color requirements, or production method.
A useful quotation therefore needs at least:
- CAD geometry
- desired material
- expected initial quantity
- likely future volume
- critical tolerances
- surface requirements
- assembly or functional requirements
The manufacturer can then evaluate whether prototype tooling, production tooling, CNC machining, or another process is more appropriate.
From Prototype Tooling to Production
Prototype molding should ideally reduce uncertainty for the next production stage.
Prototype tooling can support design feedback, iterative development, validation, and market testing before a larger production commitment.
A typical path is:
3D prototype → DFM → prototype tool → molded samples → testing and adjustment → production decision
In some projects, rapid injection molding prototyping can also function as bridge production while final production tooling is being completed.
The important point is that the first molded batch should be used to learn. Dimensions, material response, assembly, cosmetic requirements, molding behavior, and any changes should be recorded before the project scales.
HingTung can support this transition from tooling and trial molding through inspection and later production, allowing feedback from prototype parts to be carried into the next mold or production stage rather than being treated as an isolated sample order.
FAQs
Can CNC Machining Replace an Injection-Molded Prototype?
For some tests, yes.
CNC can produce accurate geometry without mold investment and may be suitable when only one or a few parts are needed. However, machining does not reproduce injection flow orientation, molded shrinkage, gates, weld lines, or other molding-specific effects.
Is Vacuum Casting a Good Alternative?
It can be useful for some short prototype runs, particularly when approximate production-like appearance and material properties are sufficient.
However, vacuum casting cannot reproduce every injection-molding resin or molding-specific effect. The appropriate method depends on what the prototype must validate.
How Many Parts Can a Prototype Mold Produce?
There is no fixed quantity.
Prototype molding programs can range from very small batches to much larger bridge-production quantities. Some commercial services describe ranges from roughly 25 parts into the tens of thousands, but actual mold life depends on tooling material, resin abrasiveness, geometry, processing conditions, and maintenance.
Should the Prototype Mold Use the Same Material as the Production Mold?
Not always.
If the prototype tool exists mainly for design validation or limited production, aluminum or softer steel may be appropriate. If the tool is expected to transition directly into repeated production, a more durable construction may provide better long-term value.
Conclusion
Prototype injection molding makes the most sense when a product has moved beyond basic shape validation and needs molded material, manufacturing feedback, functional testing, or early production before a larger tooling commitment. The decision should consider what needs to be validated, not simply how many parts are required.
For OEM teams moving from 3D prototypes toward production, HingTung can support DFM, prototype tooling, molding, sample inspection, and subsequent manufacturing. Using prototype injection molds to resolve material, geometry, and process questions before scaling can reduce the risk of discovering those problems after higher-investment production tooling has already been built.