Lost CR3, NEF, ARW, or DNG Files? Recover RAW Photos on Mac Safely
A photographer may lose a RAW photo without losing every visible trace of the image.
Lightroom might still display a preview. A camera thumbnail may remain. An exported JPEG could exist on the Mac.
That can create a false sense that the photograph has been recovered.
It has not.
For professional photography, a JPEG preview is not the same as the original CR3, NEF, ARW, DNG, RAF, or other RAW file. The original may contain substantially more camera data and editing flexibility than the surviving preview.
That is why RAW photo recovery on Mac needs one additional question beyond normal photo recovery:
Did you recover the actual RAW original, or only an image derived from it?
What Makes RAW Photo Recovery Different?
RAW files are not simply large JPEGs.
They contain camera-specific image data and metadata that software later interprets during processing. Depending on the format, a RAW file may also contain an embedded JPEG preview.
That architecture creates an important recovery trap.
A thumbnail can survive even when parts of the full RAW data are missing.
Recoverit’s current RAW recovery guidance specifically warns that a visible embedded thumbnail does not confirm a complete RAW recovery because the main image data may still be partially corrupted or fragmented.
RAW files are also commonly larger than JPEGs.
High-resolution cameras and burst workflows therefore generate substantial amounts of storage activity. If deleted RAW files are followed by another large shoot, new data may overwrite the old image blocks relatively quickly.
For this reason, photographers should stop using the source card as soon as a missing RAW original is discovered.
Common RAW Formats Mac Photographers May Need to Recover
RAW formats vary by camera system.
Common examples include:
| Camera ecosystem | Common RAW format |
| Canon | CR2 / CR3 |
| Nikon | NEF |
| Sony | ARW |
| Adobe / multiple camera workflows | DNG |
| Fujifilm | RAF |
| OM System / Olympus | ORF |
Recoverit’s current RAW camera memory card recovery feature lists CR2, CR3, NEF, DNG, ARW, ORF, and RAF among supported creator formats.
Knowing the original format matters during recovery because it allows you to filter out unrelated JPEGs, videos, thumbnails, and project files.
A photographer looking for ARW originals should not assume that finding several matching JPEG previews means the job is finished.
Stop Using the Camera Card Before Connecting It to Mac
If the RAW original was deleted from the camera card or disappeared after formatting, stop shooting.
Do not create a few test images.
A modern high-resolution camera can generate dozens of large RAW files in seconds during burst shooting. Every new file creates more overwrite risk.
Remove the card once the camera has completed any active write operation.
Do not:
- format it again,
- copy files to it,
- run First Aid,
- repair its file system,
- use it for another shoot,
- recover files back onto it.
The goal is to preserve the card in the state it was in when you discovered the loss.
Check Whether the RAW Original Already Exists on the Mac
Before scanning, search your photography workflow carefully.
Photographers often have previews or exports in one location and originals in another.
Check:
- Lightroom’s original import location
- Capture One session or catalog folders
- Finder Pictures directories
- Photos
- Image Capture destinations
- external working SSDs
- a NAS
- Time Machine
- other backup software
- dual-card copies
Apple Image Capture can save camera media directly to a chosen destination, so it is worth checking the previously selected import folder rather than assuming the file never reached the Mac.
When you find a candidate file, verify the extension and size.
If the project originally used CR3 and the only surviving file is a 2MB JPEG, you have not found the RAW original.
Recover RAW Photos on Mac With Recoverit
If the original RAW files are missing from both the source card’s normal directory and all Mac backups, a storage scan is the next step.
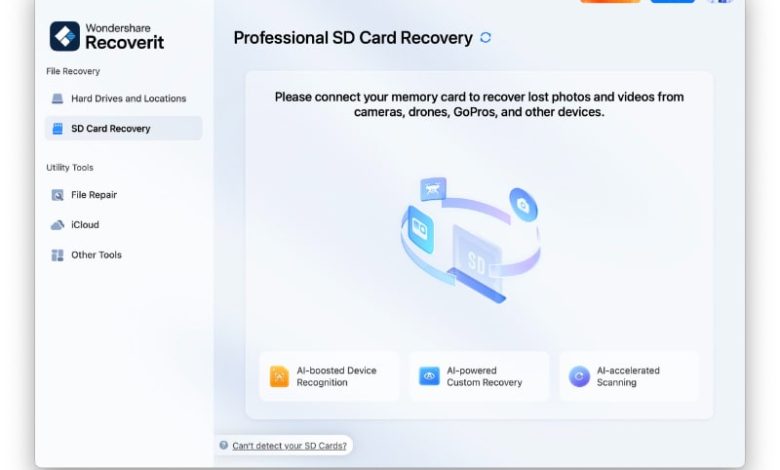
One option is Wondershare Recoverit Mac, data recovery software for Windows and Mac. Its sd card recovery feature supports common camera and RAW file types and can scan readable connected storage after deletion, formatting, or other logical data loss.
Note: Recoverit is designed for computers and connected storage rather than recovering data directly from a phone’s internal memory.
Step 1: Connect the Camera Card
Insert the source card into a reliable reader connected to the Mac.
If macOS suggests erasing or initializing the storage, cancel that prompt.

Step 2: Select the Card
Open Recoverit and choose the SD Card Recovery area or the corresponding connected device.
Confirm the storage capacity before scanning.

Step 3: Scan and Filter for RAW Images
Start the scan and let the software inspect the card.
Rather than reviewing every result, focus on the RAW extensions relevant to your camera:
- CR2 / CR3
- NEF
- ARW
- DNG
- RAF
- ORF

Also consider capture dates, approximate file size, and camera information if that metadata survived.Step 4: Locate the Right Shoot
A large photography card may contain several sessions.
Filename search is useful when original names survive, but it becomes less effective after formatting or file-system damage.
Recoverit V15’s AI Search can supplement traditional filters by indexing supported scan results using capture-time metadata, device clues, file type, and related information. A photographer can therefore use a query such as “deleted Canon RAW photos” instead of relying only on a filename that may no longer exist.
The AI feature helps rank likely scan results. It does not restore RAW data that was physically overwritten.
 Step 5: Recover to Separate Mac Storage
Save selected RAW files to the Mac or a healthy external SSD.
A dedicated directory such as:
Recovered_RAW / Client_Project / Original_Card_01
can make verification easier.
Never choose the source card as the recovery destination.

How to Verify a Recovered RAW File
Recovery should not end when the file appears in Finder.
Verify the actual image.
Check the File Size
Compare the recovered file with typical RAW sizes from the same camera.
An unusually small file can indicate incomplete data.
Open It in RAW-Compatible Software
Use Lightroom, Capture One, Photoshop, the camera manufacturer’s software, or another application that properly supports the RAW format.
Inspect the Whole Frame
Zoom in and move around the image.
Look for:
- gray or black areas,
- corrupted bands,
- incomplete rendering,
- unexpected color blocks,
- only a small preview being available.
Check Metadata
If EXIF data matters to the project, verify information such as camera model, capture time, exposure settings, and lens data.
Develop a Test Image
Try processing and exporting the RAW photo.
A file that only displays its embedded thumbnail but cannot be fully decoded is not equivalent to a healthy original.
RAW Recovery vs. RAW Photo Repair
These two terms describe different jobs.
RAW recovery is necessary when the original file is missing and you need to retrieve it from storage.
RAW repair becomes relevant when a RAW file already exists but does not open or render correctly because its contents are corrupted.
The order matters.
First recover the missing file to another drive.
Then determine whether the recovered file is healthy.
If the file exists but is damaged, consider a separate image repair workflow in Recoverit. Do not repair the SD card first simply because a recovered RAW image fails to open.
The card and the file are different recovery problems.
Protect Professional RAW Workflows From Future Loss
Professional photography creates large volumes of irreplaceable data, so the safest workflow should reduce dependence on a single card.
A practical sequence is:
Dual-Card Capture Where Appropriate → Mac Ingest → Verify RAW Count → Second Backup → Catalog/Edit → Format
After import, verify the actual RAW files rather than relying on previews in a catalog.
Open several originals from different points in the shoot. Compare expected image counts. Confirm that the backup contains the same RAW formats and file sizes.
Only after those checks should the camera card return to production.
For client work, the most valuable photograph on the card may have existed for a fraction of a second. Storage redundancy should reflect that.
Final Thoughts
RAW photo recovery on Mac is not complete simply because you can still see the photograph.
The real goal is to recover and verify the original camera file.
Stop using the card, check Mac import and backup locations, scan the source storage if necessary, and save recovered RAW files somewhere else. Tools such as Recoverit can help photographers filter supported RAW formats and locate the right shoot, while newer search capabilities can reduce the challenge of reviewing thousands of unnamed recovery results.
A surviving thumbnail can tell you what the photograph looked like.
Only a verified RAW original gives you the file you actually captured.
The post Wondershare Recoverit Introduces RAW Photo Recovery for Mac to Restore Lost Camera Originals appeared first on .