
Have you ever looked at those fancy beaded bracelets, key chains, make-up brushes, head bands or tapestries with the rows of tiny beads running the whole way and wondered how they are made? The trick is a wonderful tool known as beading loom. With or without being a total amateur or wanting to develop your beading-loom techniques, you will soon discover the creativity opportunities of having the masterful beading loom, and will revolutionize your crafting experience.
What Exactly Is a Beading Loom?
A beading loom is a special crafting machine that is intended to assist you in making beautiful and consistent beadwork using straight and parallel rows. Imagine that is your own personal assistant to do the beading so accurately: the warp threads (the foundation threads) are held taught and spaced just right so that you can weave beads in nice, professionally-appearing patterns.
This magic consists in taking beads, and threading them on a weft thread (working thread) and weaving through it in warp threads in such beautiful geometric patterns or words or detailed designs which could only be estimated in the most difficult way by the old system of stringing.
DIY Guide: How to Use a Beading Loom
Step 1: Gather Your Materials
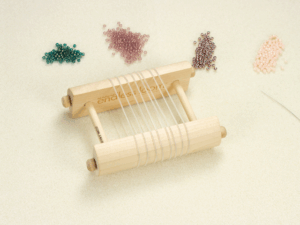
This is because you should have all you need before you begin. It requires a beading loom, beading thread, seed beads, a beading needle and a scissor. It is also possible that you prefer to maintain a bead stopper or a strip of tape to fasten your threads.
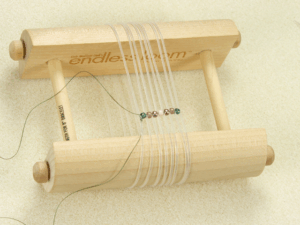
Step 2: Set Up the Warp Threads
Your beadwork is based upon the warp threads. One end of the thread should be tied to the end of the loom, then reaching to the other end of the loom hooked to the other end of the thread. Continue till you have the necessary amount of warp thread–do not forget to add one more warp thread than the number of beads you wish in each row.
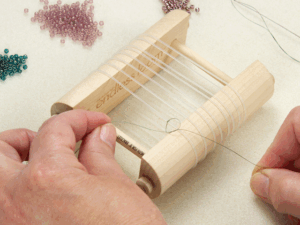
Step 3: Prepare the Weft Thread
The weft thread is the one you will weave the beads with. Take a long strand of beading thread and put it through the needle. You can tie a knot at the end so that it does not slip through in the process of working.
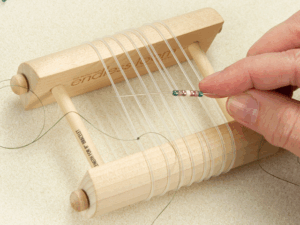
Step 4: String the First Row of Beads
Take the number of beads that you would require in your design and roll them down the thread of the weft. Lay them over the warp threads, with each bead in it. This then assists in the making of the first row of your pattern.
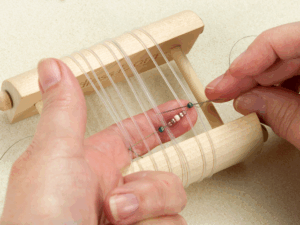
Step 5: Secure the Beads in Place
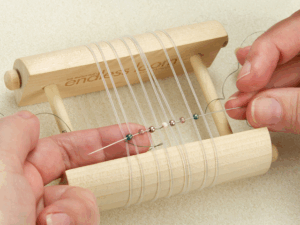
This time, however, put the needle through the beads, but over the warp threads. This movement fixes the beads in the middle of the warp threads making sure the beads do not fall out of position.
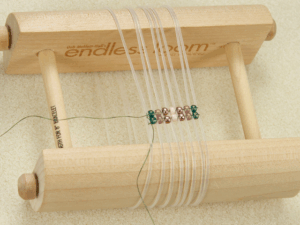
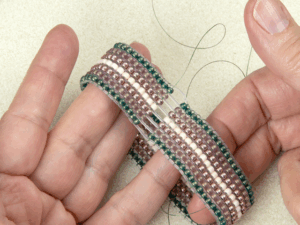
Step 6: Continue the Weaving Process
Do the same again with beads and slide them under the warp threads and then hold them in place by going through the needle again. Keep to your design or pattern and follow the rows and make them tight and even so as to have a nice finish.
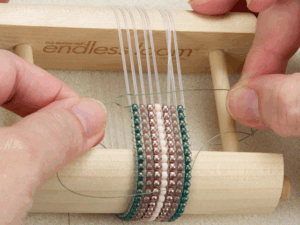
Step 7: Finish Off Your Beadwork
When you are done designing it, make sure to tie the weft thread on to the side. Then one should take the threads of the warp out of the loom carefully and knot or weave the loose ends together to make sure the beadwork remains intact.
Step 8: Add a Clasp or Finishing Touch
If you want to turn your beadwork into jewelry, attach a clasp, chain, or leather cord. You can also leave it as is for decorative use, such as bookmarks or keychains.
Advanced Techniques That Elevate Your Work
When you have the basics of loom beading down, it is time to venture into other methods that you can use to give a professional finish to your work. Color gradation produces beautiful sunset or waves effects of the ocean by the progressive shift of the color to another one. Pattern work is one which allows you to use geometric designs, words, or even pixel-inspired works with bead work.
The edge finishing methods are used to make amateur-like projects look professional. Knowing how to weave in the ends of the thread, add sharp edges, or add findings such as a clasp or a jump ring, are the difference between the jewelry made by the amateur and the jewelry made by the craft fair.
Troubleshooting Common Beading Loom Challenges
All beaders will have frustrations during the path and understanding how to find solutions to common issues will continue to keep your projects on track. Lumpy tension can be used to form imprecise rows – exercise in keeping the tension uniform and invariable looms may have your preferred settings marked down.
The cracked fibers occur to everybody. Have an extra thread, so that you know how to seamlessly join the new thread in the middle of the project. The art of thread starting and thread stopping is one learned by trial, and results in far less messy finished work.
Beads may not lie flat, or may appear to clump together, so make sure that you have a straight thread path. Always remember to cross and underpass warp threads in the right order.
Creative Project Ideas to Inspire Your Next Creation
Beading looms aren’t limited to simple bracelets. Try creating bookmarks with inspiring quotes, decorative trim for clothing or home décor items, or even small tapestries featuring geometric patterns or nature scenes. You can also experiment with creating custom designs for beadable items like pens, badges, keychains, or cardholders, etc.
The seasonal projects can refresh and update your crafting. Decorate them with Christmas objects and holiday colors, and the changing seasons with patterns of leaves and headbands in the summer festival.
The sets – bracelet and earring combinations, or even coordinated sets of wedding parties or family parties.
Building Your Beading Loom Skills Over Time
The beading loom work just like any craft is enhanced with practice. Begin a routine of practice that is daily or weekly, even fifteen minutes of practice on technique. Creating a project journal, taking photos of finished works, writing down about the effective color combinations, drawing future design concepts.
Participate in online crafting communities or local crafting groups where you are able to share your projects, ask questions and learn more through the experienced beaders. The beading community is so accommodating in knowledge and support.
Conclusion: Your Beading on Loom Journey Awaits
Learning the beading loom gives you a way of limitless creative expression and also gives you the meditative pleasurable feel of working with your hands. You might want to make a heirloom jewelry item, just want to open a small business or just want to spend a nice relaxing time with your bead, but anyway, it all starts with that first bead in place.