Macs make it easy to import, preview, and share pictures. Still, if you want to edit photos on a Mac, third-party applications can ensure advanced modifications and higher-quality final results. Luminar Neo is a photo editor for Mac, which is catered to all skill levels. It puts essential tools up front, keeps edits non-destructive, and utilizes helpful AI for repetitive tasks. You can spend more time developing your artistic style rather than navigating complex menus.
In this step-by-step guide, we explain how to edit pictures on a Mac using Luminar Neo. We will help you establish a reliable post-processing routine tailored to any project. You will see where AI helps, where manual control still matters, and how to keep everything fast on macOS.
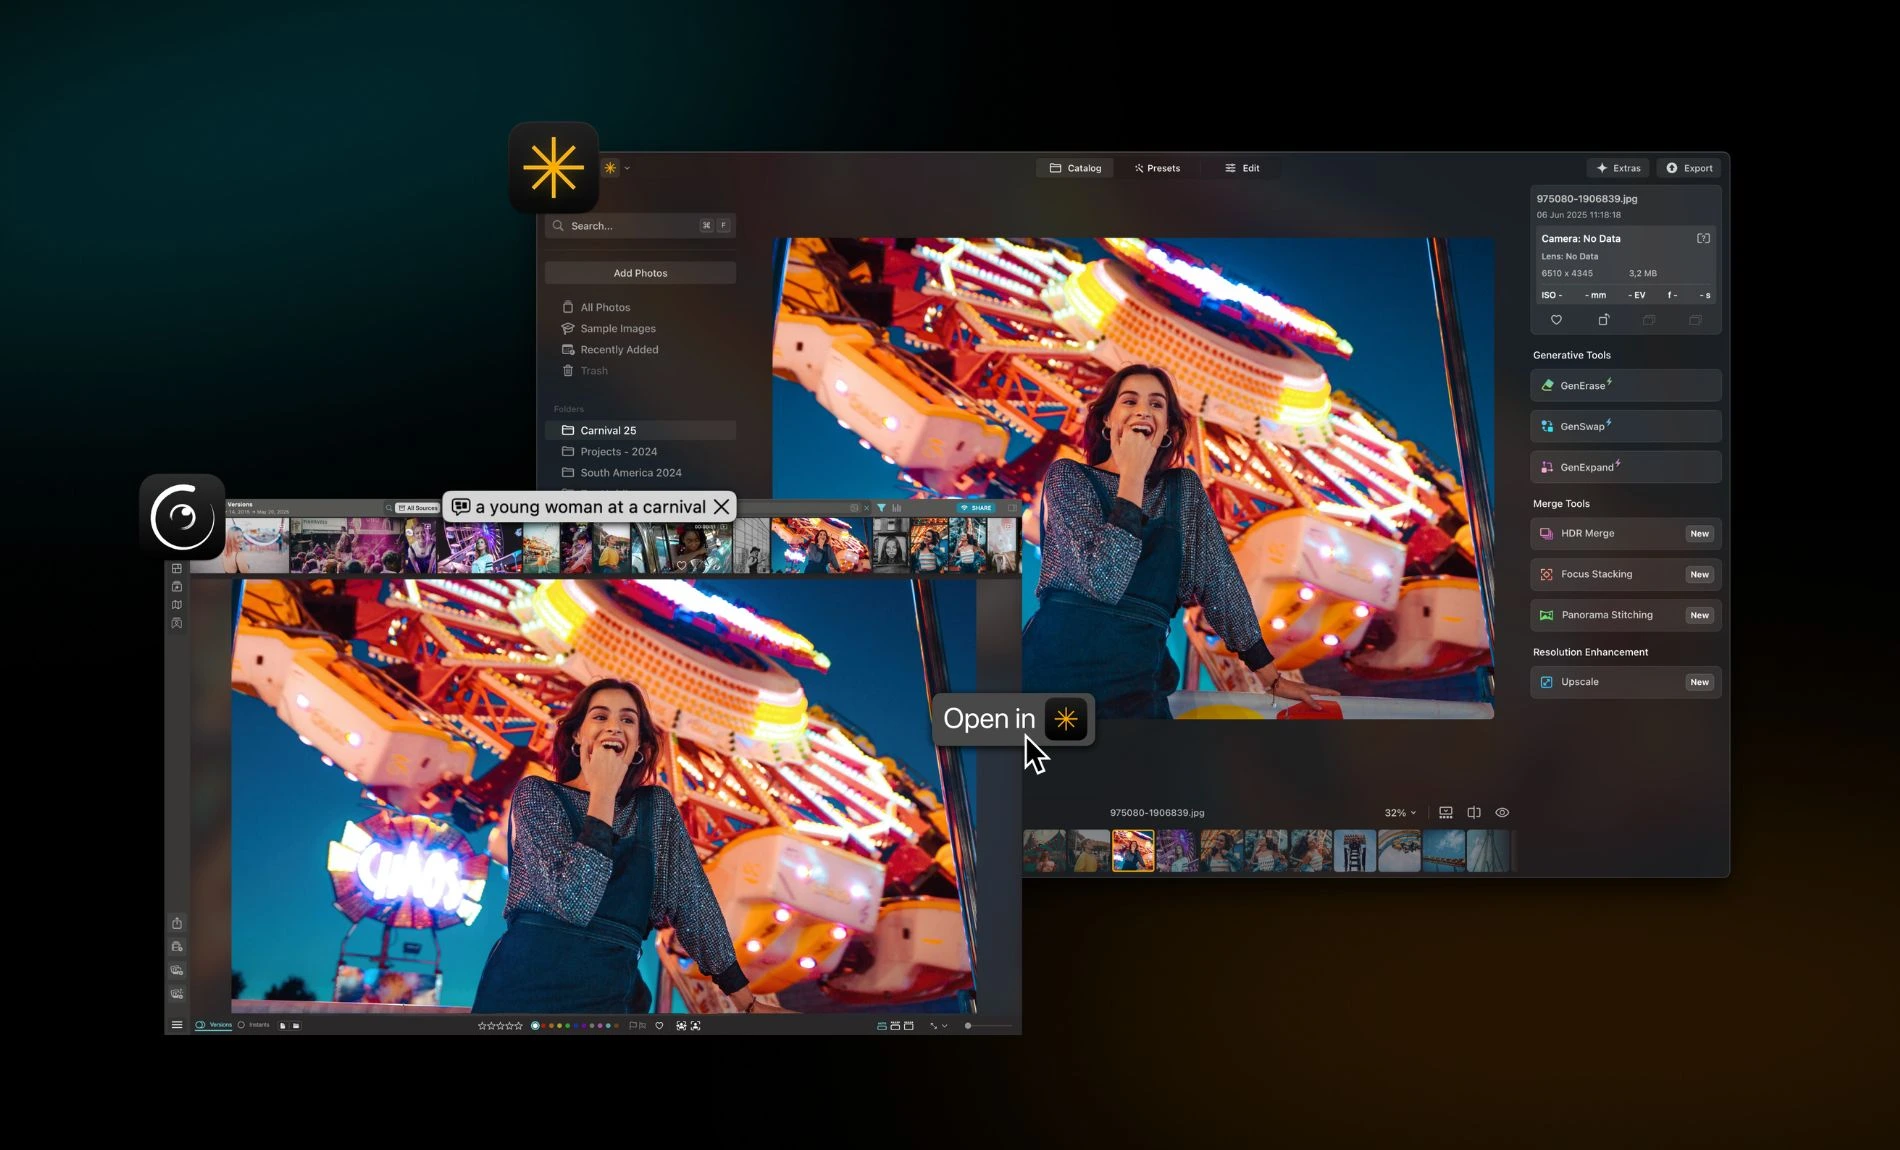
Step 1: Install, Launch, and Prepare Your Files
Photo editing software for Mac should be quick to set up and ready for real work. Download and install Luminar Neo, sign in, and choose where your catalog will be located — on the internal SSD or an external drive. Once you launch the app, enable hardware acceleration to ensure that previews and AI tools remain responsive. Create a simple folder structure on your Mac to ensure easy navigation and organization.
If you work with HEIC files, Luminar Neo supports this format, but learning how to convert HEIC to JPG on Mac may still be helpful. You can generate share-friendly files without surprises on non-Apple devices.
Import your images into Luminar Neo using the “Import” button or the drag-and-drop system. Flag the favorites and add quick color labels. Before moving on, test a tiny export set to confirm file names, color profile (sRGB for web, Adobe RGB or ProPhoto for print workflows), and output sharpening.
Step 2: Build a Clean Baseline
The best image editor for Mac is the one that gets you to a natural-looking starting point fast. In Luminar Neo, open the Develop panel and adjust the exposure to prevent highlights from being clipped. Use the eyedropper on a gray area if available to adjust the white balance for realistic neutrals.
Cropping and straightening will fix tilted horizons and refine your composition. Distortion and vignetting from the lens can ruin your picture’s appeal, so ensure the lens correction is enabled before applying edits.
Slight adjustments in highlights and shadows can add depth. When color still feels off, fine-tune with HSL to tame a single problem hue. Save these minimal adjustments as a preset and start working on the next images from here.
More experienced photographers can experiment with LUT for photography. LUTs ensure more sophisticated color refinements. Apply at low intensity, then refine contrast and color after the LUT. If you do it too early, the results might look unrealistic and overprocessed. With a clean start locked in, you are ready for targeted local edits in the next step.
Step 3: Apply Local Adjustments
The best way to edit photos on Mac is to make small, targeted changes that draw viewers directly to the subject. Luminar Neo’s tools (Supercontrast, Structure, NoiselessAI, etc.) support selective masking. It means that you can apply the adjustment only to a specific area, using a brush or a gradient (radial or linear).
Background and Contrast
For instance, if you apply a subtle midtone boost around your subject in Supercontrast, it will help you keep the background calm and guide the viewer’s eye where it should be without visual overload. A slight depth nudge will keep the backgrounds neutral.
Noise and Sharpening
Use Structure sparingly on textures like fabric, rocks, or wood in your landscape and travel shots. Open NoiselessAI, select the lowest strength that reduces the grain, and zoom to 100% while adjusting. Finish each image with ‘Before/After’ to confirm the eye lands where you want it to, and the frame still feels realistic. SupersharpAI can help you recover micro-contrasts without introducing artificialness.
Cleanups
For quick distraction fixes, use GenErase on power lines, signage, or small clutter. Draw once, then evaluate and refine with a smaller brush on edges or patterns, such as brick and foliage. More experienced users with a keen eye for detail can eliminate unwanted elements manually, using the Erase tool or cloning.
Once satisfied, toggle ‘Before/After’ to full view and 100%. When the subject reads clean and the scene feels believable, you are done. Save the edited file in your preferred format and share it as you wish.
Step 4: Save and Export
Use Export recipes to quickly output web, print, or client-proof versions (choose format, size, color profile, and output sharpening). For quick sharing, publish a curated gallery to Spaces. Send the links, and the updates will sync automatically. You can also export directly to your drive or Photos app for handoff and archiving.
Conclusion
Editing gets easier when the steps are clear and the tools stay out of your way. With Luminar Neo on macOS, you set up once, build a clean baseline, guide the eye with quick local adjustments, and let AI handle the routine fixes like noise, sharpness, and small distractions. This software ensures faster turnarounds, cleaner images, and results that feel intentional on every Mac.