You remove an unwanted object from your photo expecting a clean, seamless result… but the edited area suddenly looks blurry, smudged, or obviously fake. Broken edges, strange shadows, repeated patterns, and messy textures can quickly ruin an otherwise perfect image.
That’s why so many people search for things like “why AI object remover is not working” or “how to fix bad AI photo edits.” Most editing issues happen because of weak AI reconstruction, inaccurate object selection, or low-quality editing tools that fail to rebuild the background naturally.
The good news? These problems are easier to fix than you might think. With the right editing techniques and a smarter ai object remover online like Media.io, you can create smooth, realistic edits without damaging your photo quality.
Let’s explore the most common AI editing mistakes and the best ways to fix them for cleaner, more natural-looking results.
Why AI Object Removal Fails More Often Than You Think
Most AI tools focus on removing objects quickly, not rebuilding the background naturally. That’s why many edits end up looking blurry or fake.
Common Problems
- Poor edge detection
- Smudged background fill
- Broken textures and patterns
- Uneven lighting or shadows
These issues become more noticeable in complex scenes like crowds, reflections, hair, or detailed backgrounds. Weak AI struggles to understand surrounding textures properly, which often leaves visible editing marks. Without smart reconstruction technology, even a small object removal can make the entire photo look unnatural.
5 Mistakes to Avoid When You Remove Unwanted Object from Photo AI
Most bad AI photo edits happen because of a few common mistakes that many users don’t even notice. The good part? Once you understand these problems, it becomes much easier to create clean edits without ruining image quality.
Mistake #1: Blurry Patches After Object Removal
One of the most common problems people notice after editing is blurry or smudged areas where the object used to be.
What Goes Wrong
Lower-end AI models often rely on simple blur-based filling instead of intelligent reconstruction. As a result, texture details disappear completely, making the edited section look soft and unnatural compared to the rest of the image.
This usually happens when:
- The selected area is too large
- The AI cannot understand nearby textures
- Low-quality tools use basic blur processing
How to Fix It
You can improve results by:
- Using high-resolution images
- Keeping your selection smaller and more accurate
- Avoiding unnecessary background selection
- Choosing advanced AI tools with smart reconstruction technology
A powerful tool to remove unwanted object from photo ai like Media.io helps preserve texture, depth, and surrounding details for cleaner edits.
Mistake #2: Wrong or Messy Selection
Even the best ai object remover online can struggle if the object selection is inaccurate.
What Goes Wrong
Many users accidentally select too much background or miss small object edges during editing. This creates:
- Jagged outlines
- Broken edges
- Uneven blending
- Strange texture mismatches
The final image may look obviously edited even if the AI itself is powerful.
How to Fix It
For cleaner results:
- Zoom in before selecting the object
- Use smaller brush strokes
- Select objects carefully around edges
- Remove difficult objects in smaller sections
Precise selections give the AI more accurate information to rebuild the background naturally.
Mistake #3: Broken or Distorted Backgrounds
Complex backgrounds are one of the biggest challenges for AI editing tools.
What Goes Wrong
After removing an object, some tools fail to rebuild patterns correctly. This creates:
- Repeated textures
- Crooked lines
- Distorted backgrounds
- “Cut-and-paste” looking edits
These problems become more visible in images containing tiles, fences, buildings, fabrics, water, or detailed patterns.
How to Fix It
To avoid distorted backgrounds:
- Don’t remove large complex objects in one click
- Work on smaller sections gradually
- Use AI tools that understand texture depth and pattern consistency
Media.io uses intelligent reconstruction to blend nearby textures naturally instead of copying random pixels.
Mistake #4: Using Low-Quality or Wrong Images
The quality of your original image directly affects the final AI editing result.
What Goes Wrong
Low-resolution or heavily compressed photos don’t contain enough visual information for the AI to rebuild details properly.
This often leads to:
- Pixelated backgrounds
- Soft textures
- Missing details
- Poor reconstruction quality
Even advanced AI tools can struggle when the original image quality is too low.
How to Fix It
For better results:
- Always upload high-resolution photos
- Avoid screenshots or compressed social media images
- Use original image files whenever possible
The more detail your image contains, the better the AI can recreate natural-looking backgrounds.
Mistake #5: Expecting One-Click Perfection
AI editing tools are powerful, but complex edits still require a little patience.
What Goes Wrong
Many users expect flawless results instantly after one click. But detailed scenes with shadows, reflections, hair, or crowded backgrounds may need small adjustments.
Rushing the process often creates:
- Visible editing marks
- Incomplete blending
- Strange shadows
- Unrealistic textures
How to Fix It
To get smoother edits:
- Remove objects step-by-step
- Preview edits before downloading
- Refine difficult areas manually if needed
- Keep edits subtle and natural-looking
Small adjustments often make a huge difference in the final image quality.
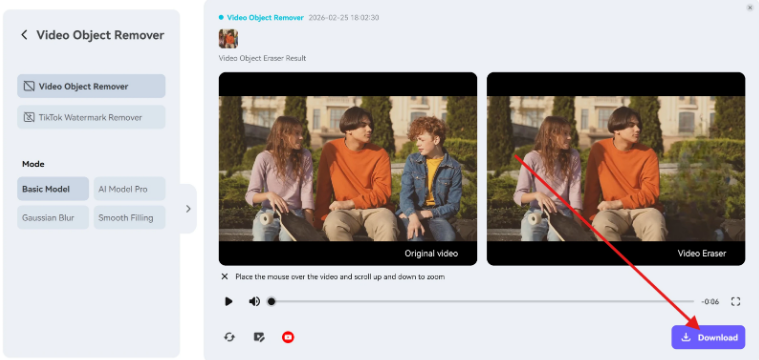
Why Media.io is the Ultimate AI Object Remover Online for Flawless Edits
Many AI tools focus only on deleting objects. While Media.io focuses on making edits look invisible.
Here’s how Media.io solves common AI editing problems:
- Smart background reconstruction prevents blur patches
- Better edge detection creates cleaner selections
- Maintains textures, lighting, and surrounding patterns
- Fast and beginner-friendly editing workflow
- Works completely online with no installation required
Simple Steps to Use Media.io
Step 1: Upload Your Image or Video
Open Media.io AI object remover in the browser of your phone or laptop and upload the image or video you want to edit directly from your device.

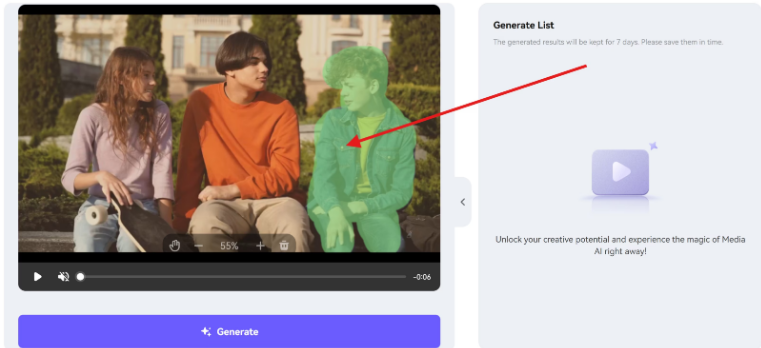
Step 2: Highlight the Object You Want to Remove
Use the brush or selection tool to mark the unwanted object, person, text, logo, or watermark. You can adjust the brush size for more precise editing.
Step 3: AI Remove Objects & Rebuild Background
Click the on the generate button and let the AI automatically erase the selected area while blending the background naturally for a clean result.
Step 4: Preview and Download the Final Result
Once the editing process is complete, preview the output to check the quality. If everything looks good, download your edited image or video in high quality.
Media.io is designed for users who want realistic edits without complicated editing skills.
Pro Tips for Flawless Results Every Time
These simple tips can help a lot to get a cleaner ai edit:
- Work on one object at a time
- Zoom in for more accurate selections
- Avoid selecting extra background areas
- Don’t over-edit the image
- Keep the final result natural-looking
Careful edits almost always produce better results than aggressive one-click removals.
Conclusion
AI object removal can save time and completely transform your photos. But bad edits are still very common. In most cases, the problem comes from weak editing tools or unrealistic expectations.
Fortunately, these are all simple errors that can be prevented with the proper workflow and smarter editing platform. For clean, realistic, and hassle-free results, use the Media.io ai object remover online to experience smoother and more natural-looking edits instantly.
FAQs
Q1: Why does my AI object remover leave blur patches?
Blur patches usually happen because basic AI tools use weak background reconstruction instead of intelligent texture rebuilding.
Q2: How do I fix bad AI photo edits?
Utilize more AI tools, make careful object selection, and take steps rather than delete all at once.
Q3: What is the best ai object remover online for clean results?
Media.io is known for realistic object removal, natural background reconstruction, and beginner-friendly editing.