The good news is that once you understand why these mistakes happen, achieving professional results becomes effortless. By choosing a high-quality free ai background remover, you can fix these issues instantly. In this guide, we’ll show you how to remove background ai with precision and make your images look polished and natural.
Common Problems People Face with AI Background Removers
Most users think AI background removal fails randomly, but the problems usually follow a pattern. Here are some of the most common AI background removal problems that make images look unfinished or obviously edited.
Blurry or Rough Edges
This is usually the first sign that something went wrong.
Instead of a clean cutout, the subject ends up surrounded by:
- Soft blurry outlines
- Jagged corners
- Uneven edge transitions
The image may still look “usable,” but it loses the polished feel people expect from a professional edit.
Missing Parts of the Subject
And sometimes the issue gets even worse.
AI may accidentally remove:
- Fingers
- Shoes
- Jewelry or accessories
- Parts of clothing
This usually happens when the subject blends too closely into the background. This makes it difficult for the AI to separate both elements correctly.
Poor Hair or Detail Detection
But the biggest challenge for most AI systems is handling fine details.
Hair, fur, and transparent fabrics are difficult because they contain soft edges and complex textures. Lower-quality tools often:
- Smudge hair strands
- Remove fine textures
- Create unnatural edge lines
Background Not Fully Removed
Even after processing, many images still contain:
- Shadow patches
- Background fragments
- Random blur areas around the subject
These imperfections may seem small, but they instantly reduce the professional quality of the image.
Now the real question is: why do these problems happen even when the image itself looks perfectly fine?
4 Hidden Reasons Why Your Remove Background AI Is Failing
Mostly, the issue is not the subject itself. It’s the combination of image quality, lighting, and the AI tool being used.
Low-Quality Image Input
AI background removers depend heavily on image clarity to detect edges correctly.
If your image has:
- Pixelation
- Compression artifacts
- Low resolution
- Motion blur
the AI often struggles to separate the subject from the background cleanly.
Think of it this way: when the input image looks blurry or unclear, the final output usually does too.
Complex or Cluttered Background
Even a powerful AI can struggle when the background is packed with:
- Similar colors
- Heavy patterns
- Crowded objects
- Visual distractions
The more visual distractions in the frame, the higher the chance of errors when using a basic remove background ai tool.
Poor Lighting Conditions
Lighting affects AI accuracy more than most people expect.
Problems usually happen when:
- Shadows hide parts of the subject
- Lighting is uneven
- Contrast is too low
Without proper separation between subject and background, the AI starts making incorrect guesses.
Using a Low-Quality Tool
Not all AI tools are designed with the same level of precision.
Some tools prioritize speed but sacrifice:
- Edge accuracy
- Hair detection
- Output quality
- Realistic detail preservation
That’s why choosing a more reliable tool changes the entire editing experience.
The Ultimate Fix: Use Media.io as Your Free AI Background Remover
A lot of AI background removers promise quick results, but speed alone doesn’t guarantee a clean cutout. The real difference comes from how well the tool handles fine details, edges, and natural subject separation.
That’s exactly why Media.io stands out as a reliable free ai background remover. It’s built to create smoother, more professional-looking results without making the editing process feel complicated.
Here are the quick steps to use it properly for the best possible results.
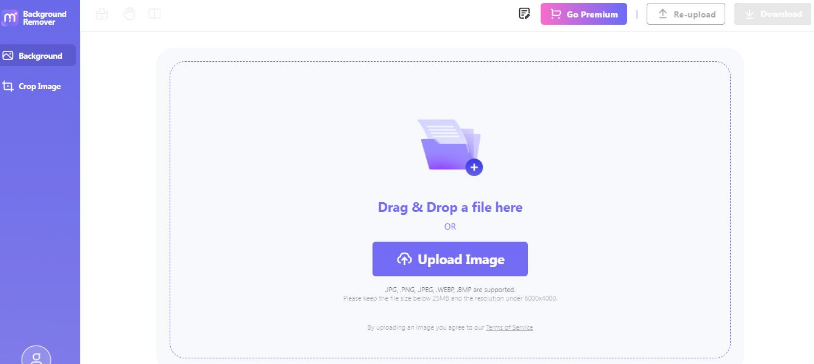
Step 1: Upload Your Image to Media.io
Navigate to the free ai background remover tool on Media.io. Simply drag and drop your photo to start the remove background ai process. This tool is optimized to handle complex details that other editors miss.
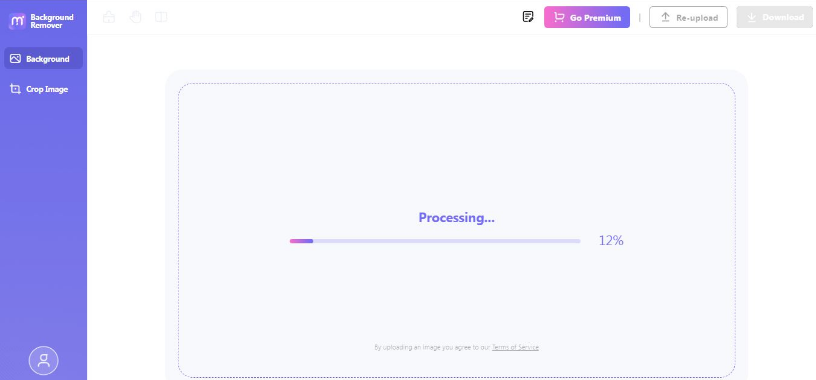
Step 2: AI Remove the Background Automatically
Once the image uploads, Media.io automatically detects the subject and removes the background within seconds.
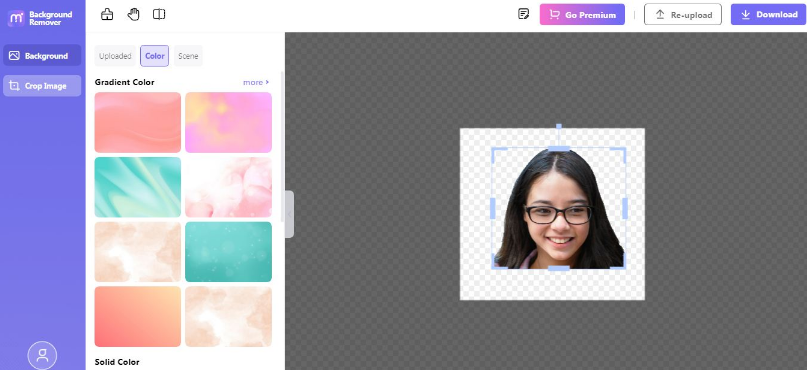
Step 3: Make Adjustments & Add New Background
After the background is removed, make small refinements to improve the image’s look. Add a new background to make the final image more natural and balanced.
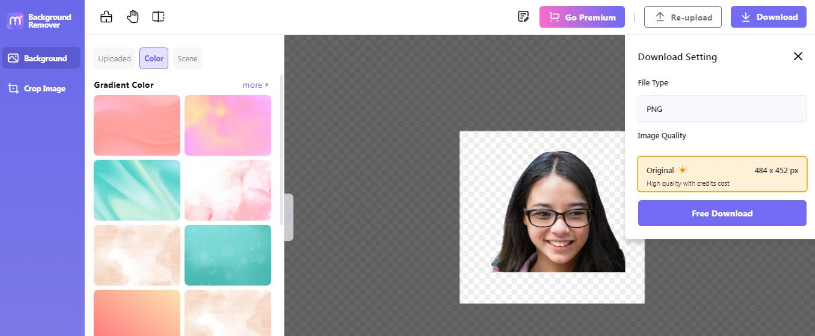
Step 4: Preview & Download Image
Preview the image, and once everything looks clean and refined, download the final image in high quality.
Now you can see how simple it is to transform messy cutouts into clean, professional-looking visuals with Media.io. Try this powerful free ai background remover and experience the difference yourself in just a few clicks.
Pro Tips to Avoid These Problems in the Future
A few simple habits can improve your results dramatically:
- Use clean, uncluttered backgrounds whenever possible
- Avoid motion blur while taking photos
- Shoot in bright, balanced lighting
- Keep a strong contrast between the subject and the background
- Always preview edges before downloading
Small improvements during image capture can save a lot of editing time later.
Conclusion
Most AI background removal problems are not random. Blurry edges, missing details, and rough cutouts usually happen because the AI lacks enough visual clarity to separate the subject correctly.
The combination of strong image quality and a reliable tool makes the biggest difference. When the AI can process cleaner edges, better lighting, and fine details accurately, the final result instantly looks more professional.
If you want faster and more natural-looking output, using a reliable ai background remover like Media.io can dramatically improve your editing experience.
FAQ
- How to enhance the accuracy of an AI background remover?
Use clear, high-quality images with good lighting and strong contrast between the subject and background for cleaner results.
- Why do AI image background remover tools create blurry edges?
Blurry edges usually happen because of low-quality photos or weak AI detection.
- Which is the best AI background remover for professional results?
Tools like Media.io are popular because they offer cleaner edges, better detail detection, and faster results without complicated editing.