You plug in your USB drive, open “Disk Management,” and there your drive is listed with “0” bytes. This isn’t just a display glitch. When Windows reports “No Media,” it means it can see the drive’s hardware shell but cannot communicate with the storage inside.
But in many cases, your files are still physically intact. The bad news is that if you take the wrong steps first, they won’t last for long. So, read this guide to recover your data and resolve the “USB drive showing no media in Disk Management,” issue in the correct way.
Key Takeaways
- USB displaying “No Media” means Windows sees the drive but can’t access the storage, even though data may still exist.
- Avoid risky actions like formatting, CHKDSK, Diskpart clean, or unplugging repeatedly to prevent permanent data loss.
- Recover data first using a read-only tool that can scan raw sectors and safely restore files.
- After recovery, try fixes like changing ports, updating drivers, scanning for malware, or formatting with Diskpart.
- If fixes fail or Diskpart shows errors, it likely indicates hardware failure and may need professional recovery.
Part 1: Why Your USB Drive Shows “No Media” in Disk Management
If your USB drive is showing no media in Disk Management, it could be because of the following reasons:
- Physical damage (USB or internal parts): Bent connector pins, broken solder joints, or a damaged controller chip can stop the drive from working properly.
- Driver problems: If Windows drivers are missing, outdated, or corrupted (often after updates or crashes), the USB drive may be detected, but its storage won’t show.
- Improper removal or power loss: Unplugging the drive while it’s in use or sudden shutdowns can corrupt files, making the drive unreadable or showing “0 bytes.”
- Low USB power: Some ports (especially front PC ports) don’t supply enough power, so the drive may not start correctly and appear empty.
- Virus or malware: Some malware can hide or damage partitions, making the drive look blank or unusable even though it still appears in the system.
Important Info: Here, one thing to understand is that even if your drive shows “No Media,” your files are often still there on the internal memory chips. The problem usually means Windows can’t access or read the data, not that it has been erased. So it’s important to be careful, because in many cases the data can still be recovered.
Part 2: What NOT to Do First
This is where most people make the mistake that turns a recoverable situation into a permanent loss. Before you try anything, read these warnings carefully:
- Don’t format the USB drive: Formatting removes the file system, making recovery much harder.
- Avoid running CHKDSK right away: It may “repair” the drive, but can also delete or move files you still need.
- Don’t keep unplugging and reconnecting it: This can further damage a weak connector or controller.
- Avoid unknown repair tools: Many are unsafe, can contain malware, or may overwrite your data.
- Don’t use Diskpart “clean”: It erases the partition info and makes recovery very difficult.
Important Info: Always try to recover your files first, then fix or replace the drive later. This is because any solution you might try might overwrite data. You might also have to format the USB when trying to fix it, which will remove its data permanently.
Part 3: How to Recover Data from a USB Drive Showing No Media
Here’s how to first retrieve files from a USB drive that’s displaying no media, with a USB data retrieval tool:
Method 1: Recover Data from No-Media USB Without Risk (Best & Safest Way)
The safest approach is purpose-built USB data recovery software that scans the drive at a raw sector level, reading what’s there without making any changes. 4DDiG Data Recovery is specifically designed for this scenario. Here are its benefits:
Key Benefits:
- Detects USB drives even when Disk Management shows “No Media” or “0 bytes.”
- Performs a read-only deep scan and never writes to your drive during the recovery process, so it cannot cause further damage.
- You can choose the file types to scan and use filters and keywords to find exact file matches.
- Recovers 2,000+ file types, including photos, videos, Office documents, PDFs, archives (ZIP, RAR), and more.
- Supports various internal/external storage media like USB flash drives, external HDDs, SSDs, and SD cards.
- Lets you preview files before committing to recovery, so you know exactly what’s coming back before you click Recover.
Step-by-Step Guide to Recover USB Data:
Here’s how to recover data from USB with 4DDiG Data Recovery:
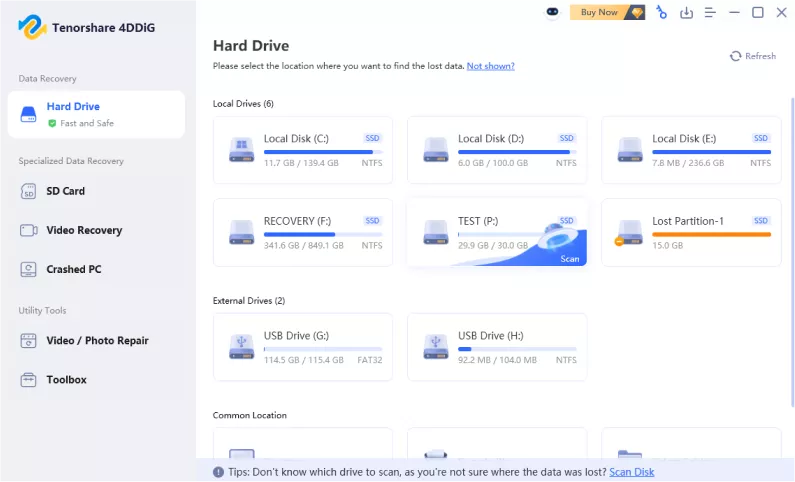
Step 1: Open 4DDiG and Plug in the USB
Install 4DDiG Data Recovery on your PC. Then, attach the problematic USB drive to the same computer. Select it in the program, even if it shows “No Media” or 0 bytes.
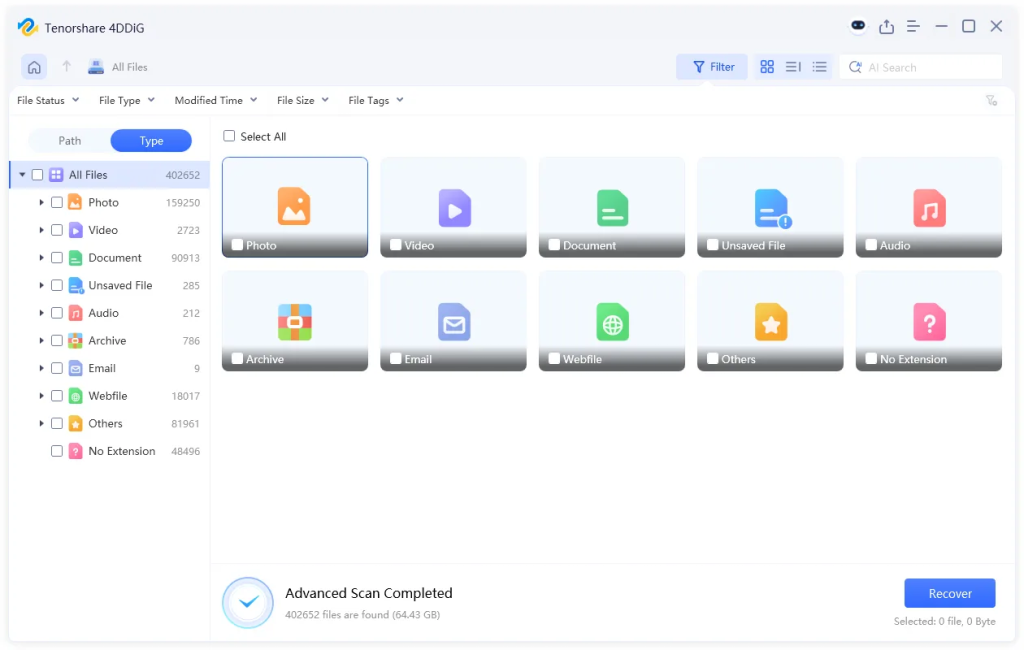
Step 2: Start a Deep Scan
Choose the file types you wish to recover. Click “Scan.” The tool will first do a quick scan, then a deeper scan to find lost or hidden files. Let it finish for the best results.
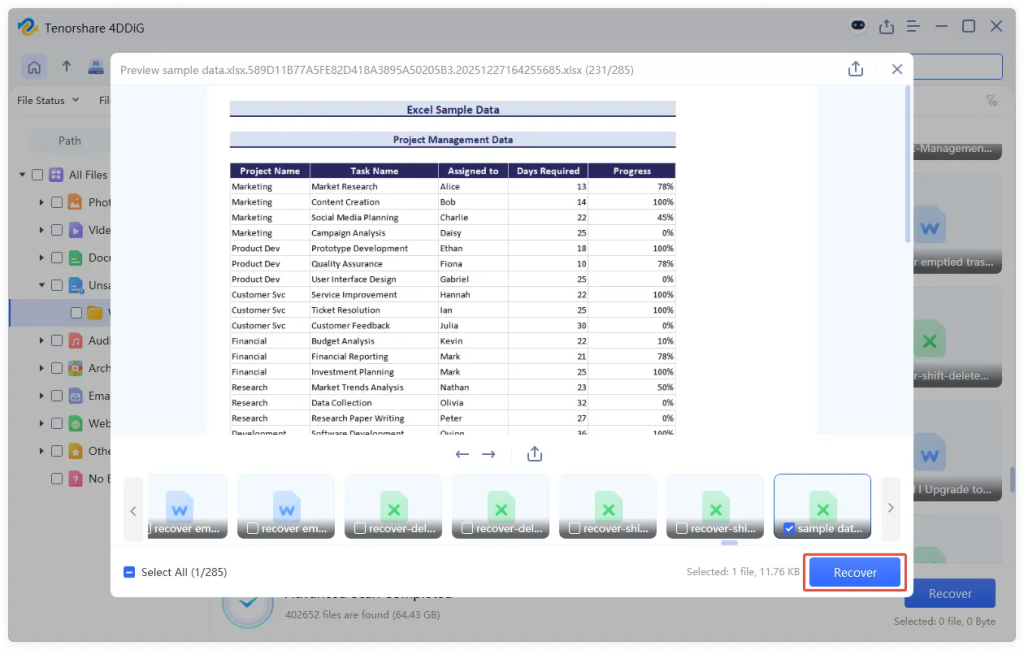
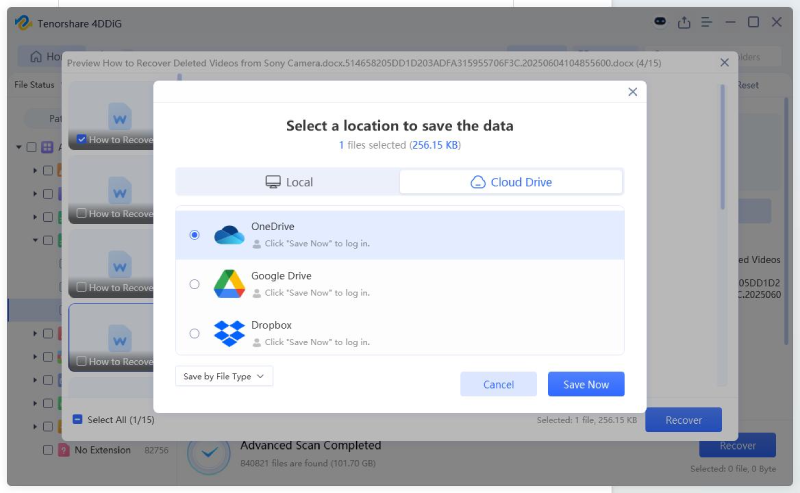
Step 3: Preview and Recover Files
Check the found files, preview them, and select what you need. Hit “Recover” and save the recovered files to a different drive (not the same USB) to avoid overwriting data.
Part 4: How to Fix USB Drive Showing No Media (After Recovery)
After you’ve successfully retrieved data from the drive, you can now resolve the “USB not detected” or USB displaying “no media” issue without risk. Work through the given solutions in order. Start with the simplest and only escalate if needed:
Fix 1: Use Other USB Ports
Front-panel USB ports on desktops can supply significantly less power than rear ports wired directly to the motherboard. So, you should unplug the USB drive, and plug it into a different port, preferably a rear port on a desktop, or a different port on a laptop. If you were using a USB hub or extension cable, connect the drive directly to the computer instead. Then, check whether the drive now shows a capacity in Disk Management.

Fix 2: Scan Antivirus Software
If malware corrupted your drive or caused your security software to lock it, clearing the infection first is necessary before any other fix will stick. Here’s how to scan your USB:
Step 1: Keep the USB plugged into your computer. Then, open Windows Security (search “Windows Security” in the “Start” menu).
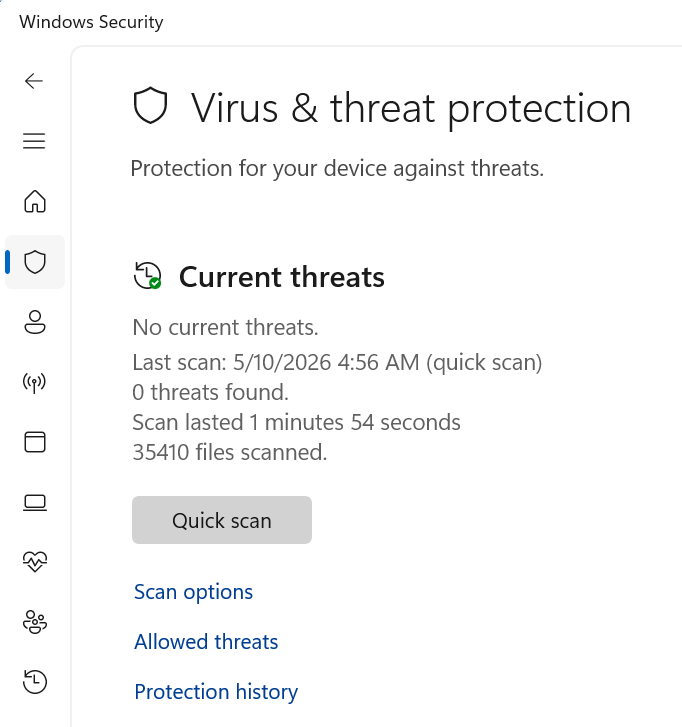
Step 2: Choose “Virus & Threat Protection.” Tap “Scan options.” Next, select “Custom Scan.”
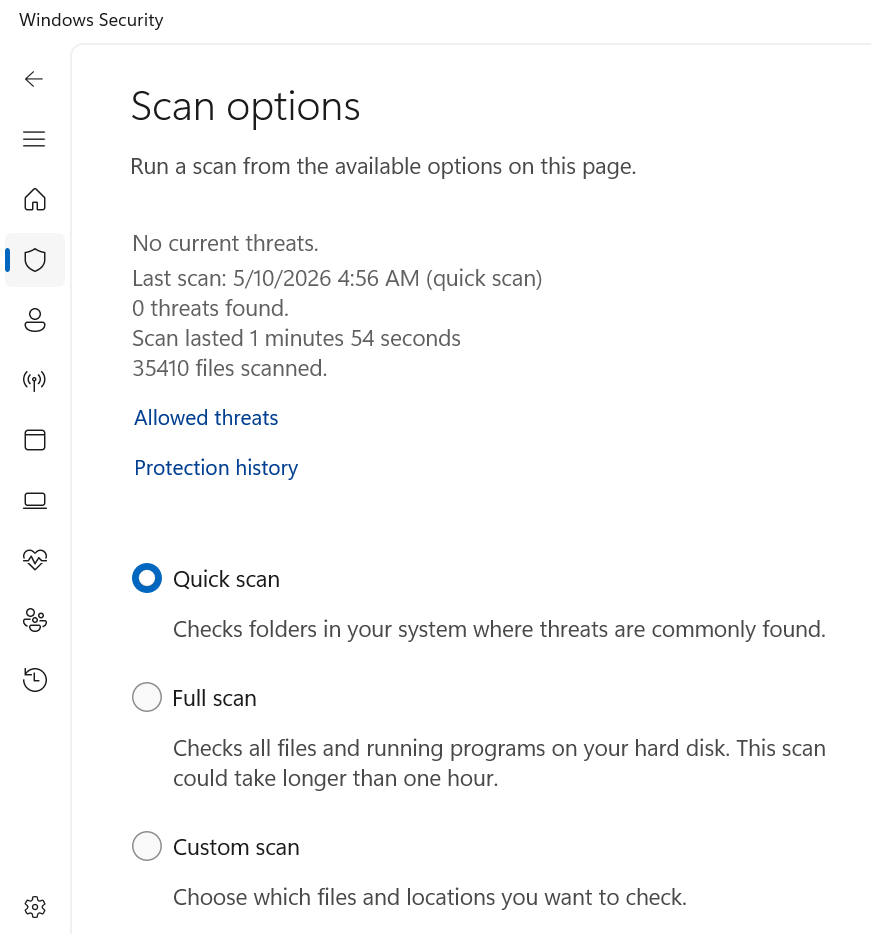
Step 3: Choose your USB drive, and run a full scan. If threats are found, quarantine or remove them. Check “Disk Management” again.
Fix 3: Enable USB in the Device Manager
A disabled or conflicted device entry in Device Manager can cause a no-media status even when the drive is physically fine. So, here’s how to perform a “no media” USB fix:
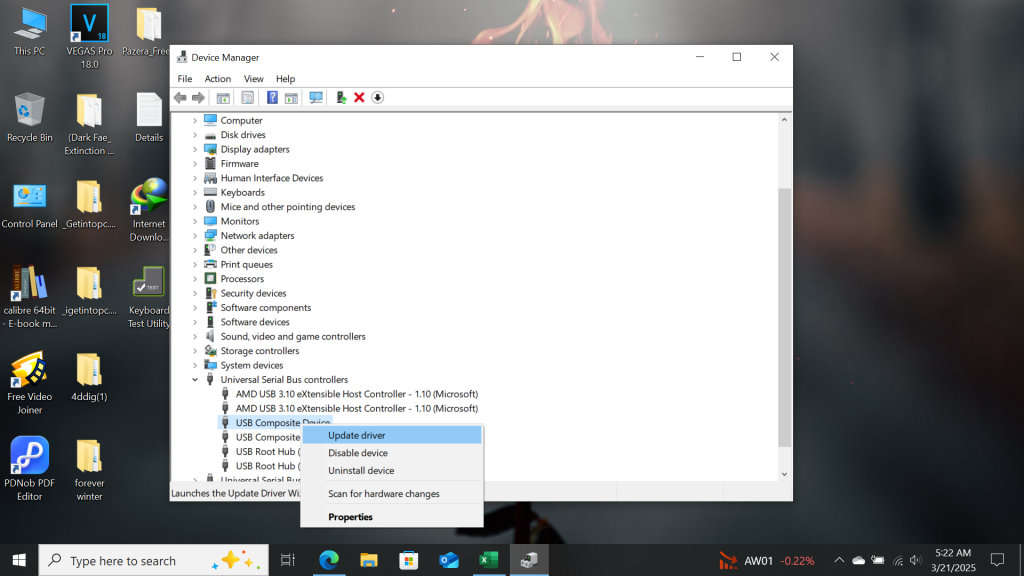
Step 1: Keep the USB plugged into your computer. Press “Win + X.” Then, select “Device Manager.”
Step 2: Expand “Universal Serial Bus Controllers.” Also, check “Disk Drives.”
Step 3: Look for any entry with a yellow warning icon or a downward-facing arrow (indicating it’s disabled).
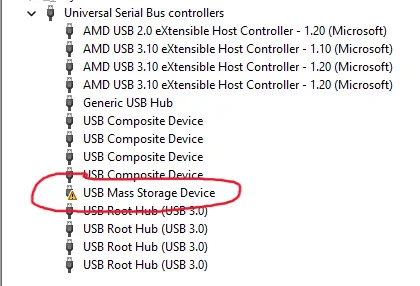
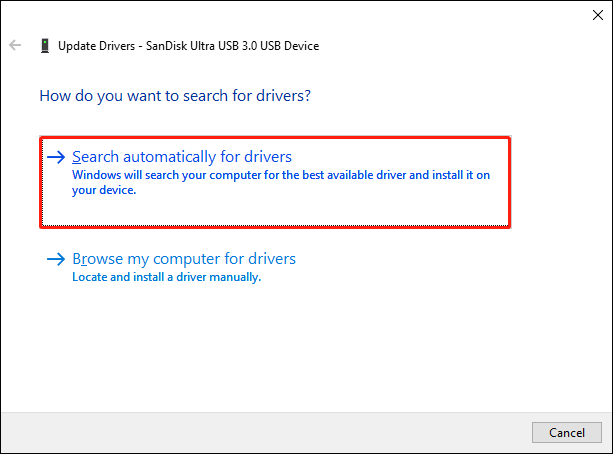
Step 4: Right-click the entry. Choose “Enable device” or “Update driver.” If chosen to update, search automatically for drivers.
Step 5: Restart your PC. Next, check “Disk Management” again.
Fix 4: Change Drive Letter
Sometimes Disk Management can see just enough of the drive to assign it a drive letter. But if that letter conflicts with another device, the drive can’t mount properly. In such a case, change the drive letter. To do so:
Step 1: Keep the USB plugged into your computer. Open “Disk Management” (“Win + X” → “Disk Management”).
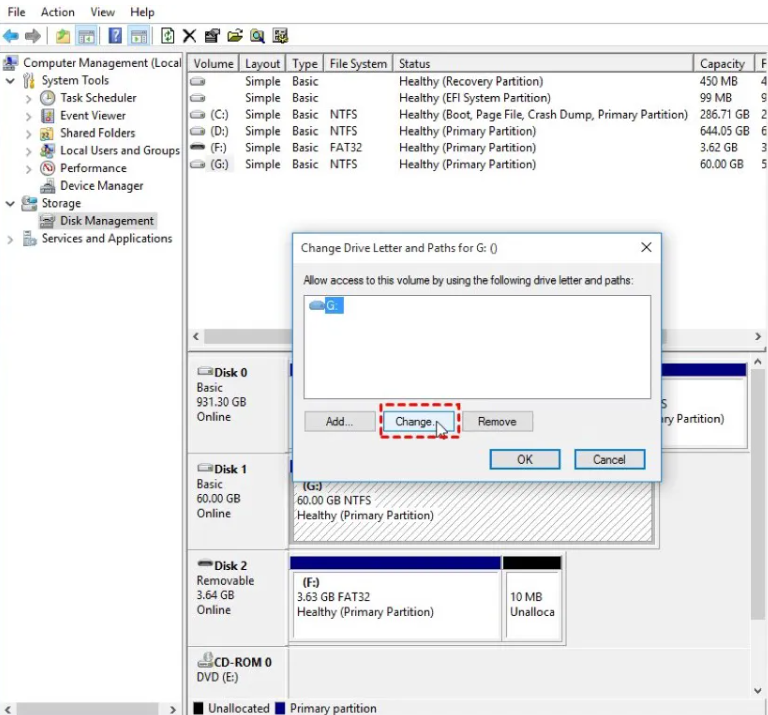
Step 2: Right-click your USB drive’s entry. Then, select “Change Drive Letter and Paths.” Next, click “Change.”
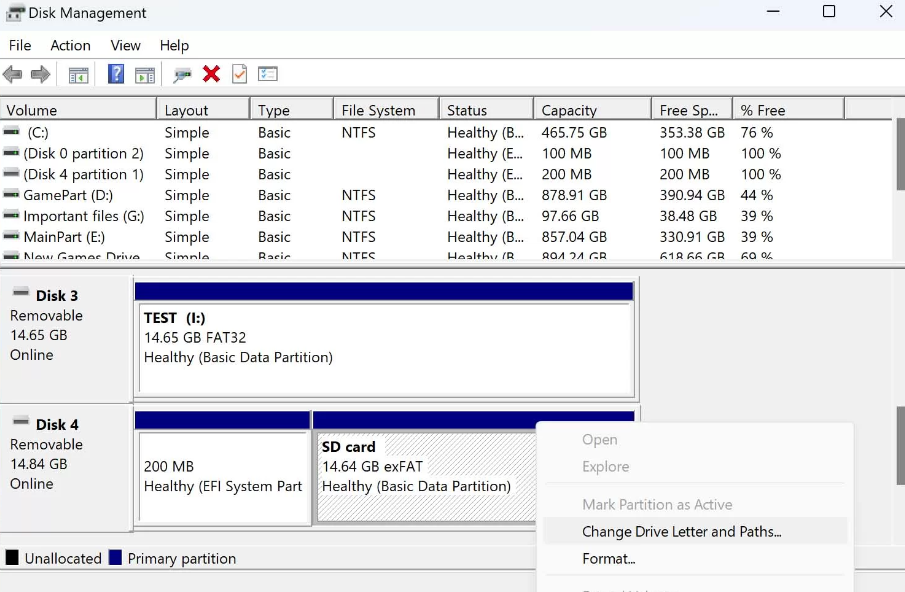 Step 3: Select a new letter from the dropdown. Click “OK” and confirm the change.
 Step 4: Open “File Explorer” and check if the drive is now accessible.
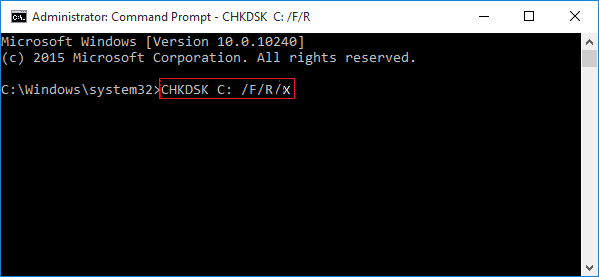
Fix 5: Use the CHKDSK Command
CHKDSK can fix logical file system corruption, the kind caused by improper ejection or power loss. This corruption might be why your USB is showing “no media.” But only run this after you’ve recovered your data, since it may delete files it classifies as damaged. Here’s how to use CHKDSK:
Step 1: Keep the USB plugged into your computer. Open the “Start” menu. Search “PowerShell.”
Step 2: Right-click it. Then, select “Run as administrator.” Type the following command:
- CHKDSK [Here place the USB drive letter]: /f /r /x
Step 3: Wait for the process to complete. This can take several minutes.
Step 4: Once done, safely eject and reconnect the USB drive. Check if it shows media now.
Fix 6: Repair USB Errors in Windows Explorer
Windows has a built-in error-checking tool that’s slightly gentler than CHKDSK. It’s a good middle step before resorting to formatting the USB. Here’s how to repair USB errors in Windows Explorer:
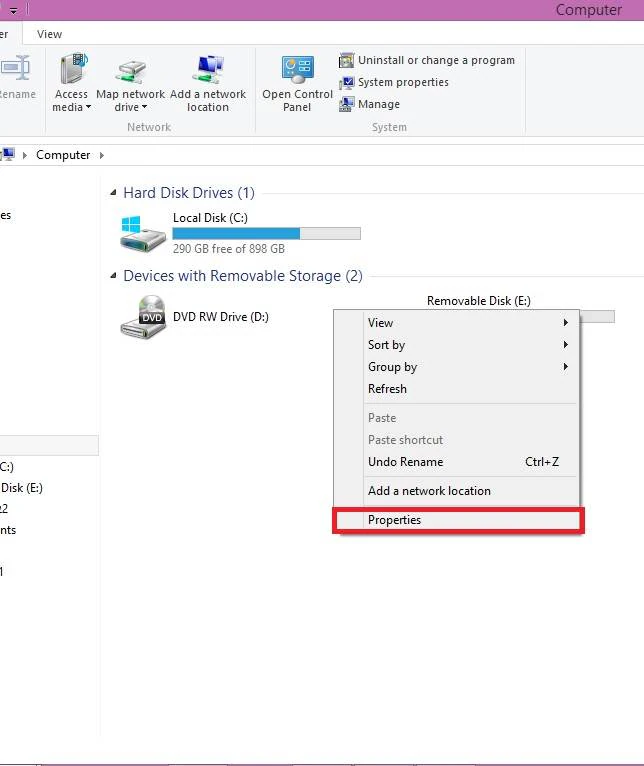
Step 1: Keep the USB plugged into your computer. Open “File Explorer.” Then, locate your USB drive in the left panel.
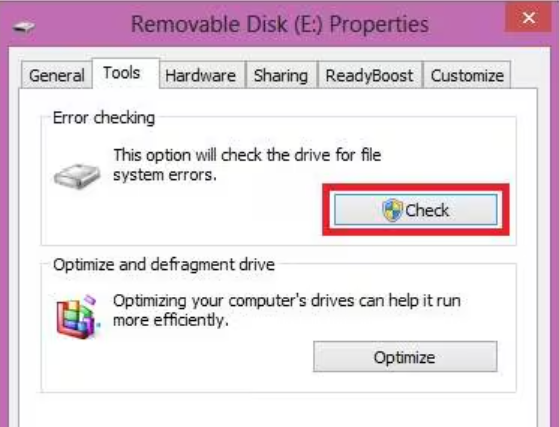
Step 2: Right-click the drive. Choose “Properties.” Head to the “Tools” tab.
 Step 3: Click “Check” beneath the “Error checking” section. Tap “Scan Drive.”
Step 4: Windows will check for and attempt to repair file system errors. Restart your computer and reconnect the USB drive.
Fix 7: Use Diskpart Format Your USB drive
If nothing else has worked and you’ve already recovered your data, Diskpart formatting is a nuclear option that will restore the drive to a usable state, or confirm it’s dead hardware. Follow the steps beneath to format your USB in Diskpart:
Step 1: Keep the USB plugged into your computer. Open the “Start” menu. Search “PowerShell.”
Step 2: Right-click it. Then, select “Run as administrator.” Type the following command one by one. Hit “Enter” after each one:
- diskpart
- list disk (This will display all connected drives. Identify your USB drive by its size).
- select disk [number] (Here replace [number] with the disk number for your USB).
- clean (This will wipe the partition table).
- create partition primary (This will create a new partition).
- format fs=ntfs quick (You can choose fat32 for drives under 32GB used across multiple OS types).
- assign (This will give it a drive letter).
- exit
 Important Info: If Diskpart throws an error during the clean or format step, the drive likely has a hardware-level failure, and professional recovery services are the only remaining option
Final Words
A USB drive showing “No Media” in Disk Management can look serious, but it doesn’t always mean your files are gone. In many cases, the data is still physically stored on the drive. The issue is usually that Windows can’t access it properly. So, recover your data first, then try fixing the drive.
A tool like 4DDiG Data Recovery is designed for this situation. It safely scans the drive without changing anything, can detect files even when Windows can’t, and lets you preview them before recovery. Once your files are saved to another drive, you can then try the repair methods.