Coming back from a shoot with hundreds of images can feel overwhelming. You know there are great photos in there, but the idea of editing each one by hand is exhausting. Knowing how to bulk edit photos can significantly simplify your life in such cases. Instead of repeating the same sliders and corrections over and over, you set your look once and apply it to many images in just a few steps. This approach will save you time, protect your energy, and keep you focused on the creative part of the process.
In this guide, we provide photo editing tips on working with batch editors. You will learn what batch editing tools actually do, which features matter most, and how to build a simple step-by-step workflow you can reuse in almost any software.
What Are Batch Processing Editors?
Batch processing editors are tools that take your chosen look like a specific brightness, contrast, or color mood, and apply it to a whole group of images with just a few clicks.
Bulk photo editing can be a lifesaver for large projects, like a wedding, an event, a portrait session, or a holiday trip, where most photos are shot under similar lighting conditions and with identical settings. Applying each enhancement manually in every frame will require time and energy. Instead, you can batch edit photos — fine-tune one picture and use it as a reference, copying its adjustments to the whole project.
Batch editors will enable you to maintain consistency in your work. A full gallery feels unified when skin tones match, colors remain consistent, and exposure levels are stable. At the same time, a good editing program allows users to fine-tune separate images afterwards, targeting specific issues.
Good image-enhancing programs offer non-destructive changes, allowing you to always revert to your original files. They support presets or looks you can reuse across different shoots. If you are wondering how to edit photos faster with little to no experience, many modern apps include automatic color correction or subject-aware adjustments to streamline the process.
Batch Processing Step by Step

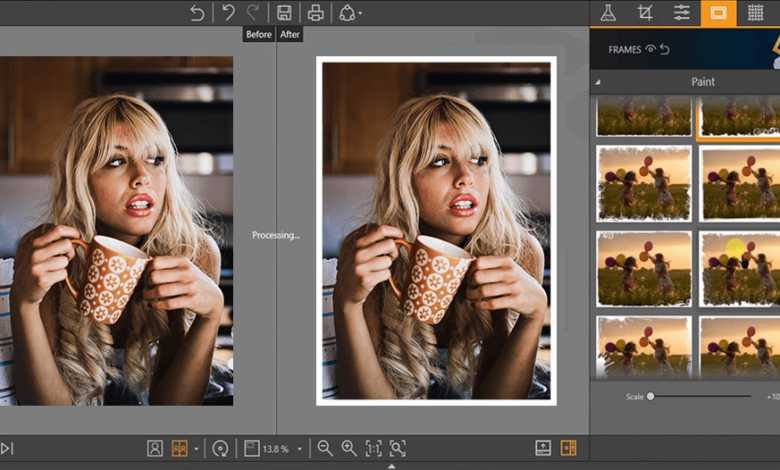
Here is a simple and repeatable batch post-processing workflow in Luminar Neo:
Step 1: Import and Do a Quick Culling
Start by opening Luminar Neo and importing your whole shoot via the Catalog panel (“Add Photos” or “Add Folder”). A quick first pass will help you identify obvious drawbacks like out-of-focus shots or closed eyes. Sort your images and delete test frames, low-quality shots, or pictures you simply don’t want to deliver, print, or post.
Step 2: Choose the Reference Photo
Once you have selected the collection of images to work with, it is time to choose the one hero shot that represents the average conditions of the shooting set. Its lighting, colors, and composition should perfectly showcase your intentions for this project. You will build the entire look around this file, so choose it carefully.
Step 3: Edit the Reference
Switch to the Edit tab and perfect your hero photo. Start with basic exposure and contrast so details are visible in both shadows and highlights. Then use tools like Develop, Curves, and Color to fix any strong color casts or heavy shadows. If needed, clean up noise and sharpen important details with the Detail and Denoise tools. Adjust white balance and overall color harmony until the image matches how you want the full set to feel. When you are happy, save these adjustments as a Preset (or Preset/Look) so you can reuse them on the rest of your photos.
Step 4: Sync Settings to Similar Photos
Go back to the Catalog and select all images shot in similar lighting and with comparable camera settings. Apply your saved preset to the selection, or use Luminar Neo’s adjustment syncing (copy adjustments from the hero photo and paste them to the group). If your shoot involves different locations or lighting setups, repeat this process for each group: choose a new hero image for each lighting scenario, refine it, and then apply its preset to the matching photos.
Step 5: Spot-Check and Fine-Tune
With the batch look applied, quickly scroll through the series in the Catalog. Open any outliers in the Edit tab and make small corrections on top of the synced adjustments. You don’t need deep, individual retouching for every file; just fix what clearly stands out — slightly darker frames, tricky skin tones, or shots with very bright highlights. Ensure the whole set feels coherent and polished.
Step 6: Save and Export
When the set looks consistent, select all final images and open the Export dialog. Choose file type, size, sharpening, and naming rules once, then apply them to the whole set. You can save the export settings to reuse them for your further projects in just a few clicks. Luminar Neo also includes web galleries (Spaces). You can use them to transform your selection into a polished web gallery and share it with clients or collaborators via a simple link, eliminating the need for separate uploads.
Conclusion
Batch software turns a chaotic folder of images into a manageable project. Start with your next session: choose one set, follow the step-by-step process, and notice how much faster it feels. With a bit of practice, batch editing stops being a “pro-only” feature and becomes a natural part of your workflow, helping you deliver more images with better quality and far less stress.